
Creating a HubSpot deal pipeline to manage customer onboarding
A walk-through for setting up an onboarding pipeline that can be used to visualize and report on your onboarding program
Deal and Ticket pipelines in HubSpot are a great way to track and visualize customers going through onboarding (just as they are used to manage prospects going through sales or issues going through support).
The Arrows <> HubSpot integration allows you to send data from your customer-facing plans to properties in HubSpot. This data can be used to automate moving customers through onboarding stages in your pipelines and provide reports to understand how long customers are in each phase - more to come on this later
The following video and steps walk through the basics for creating a new Deal pipeline to be used for onboarding purposes so you can get started.
1. Create your onboarding pipeline
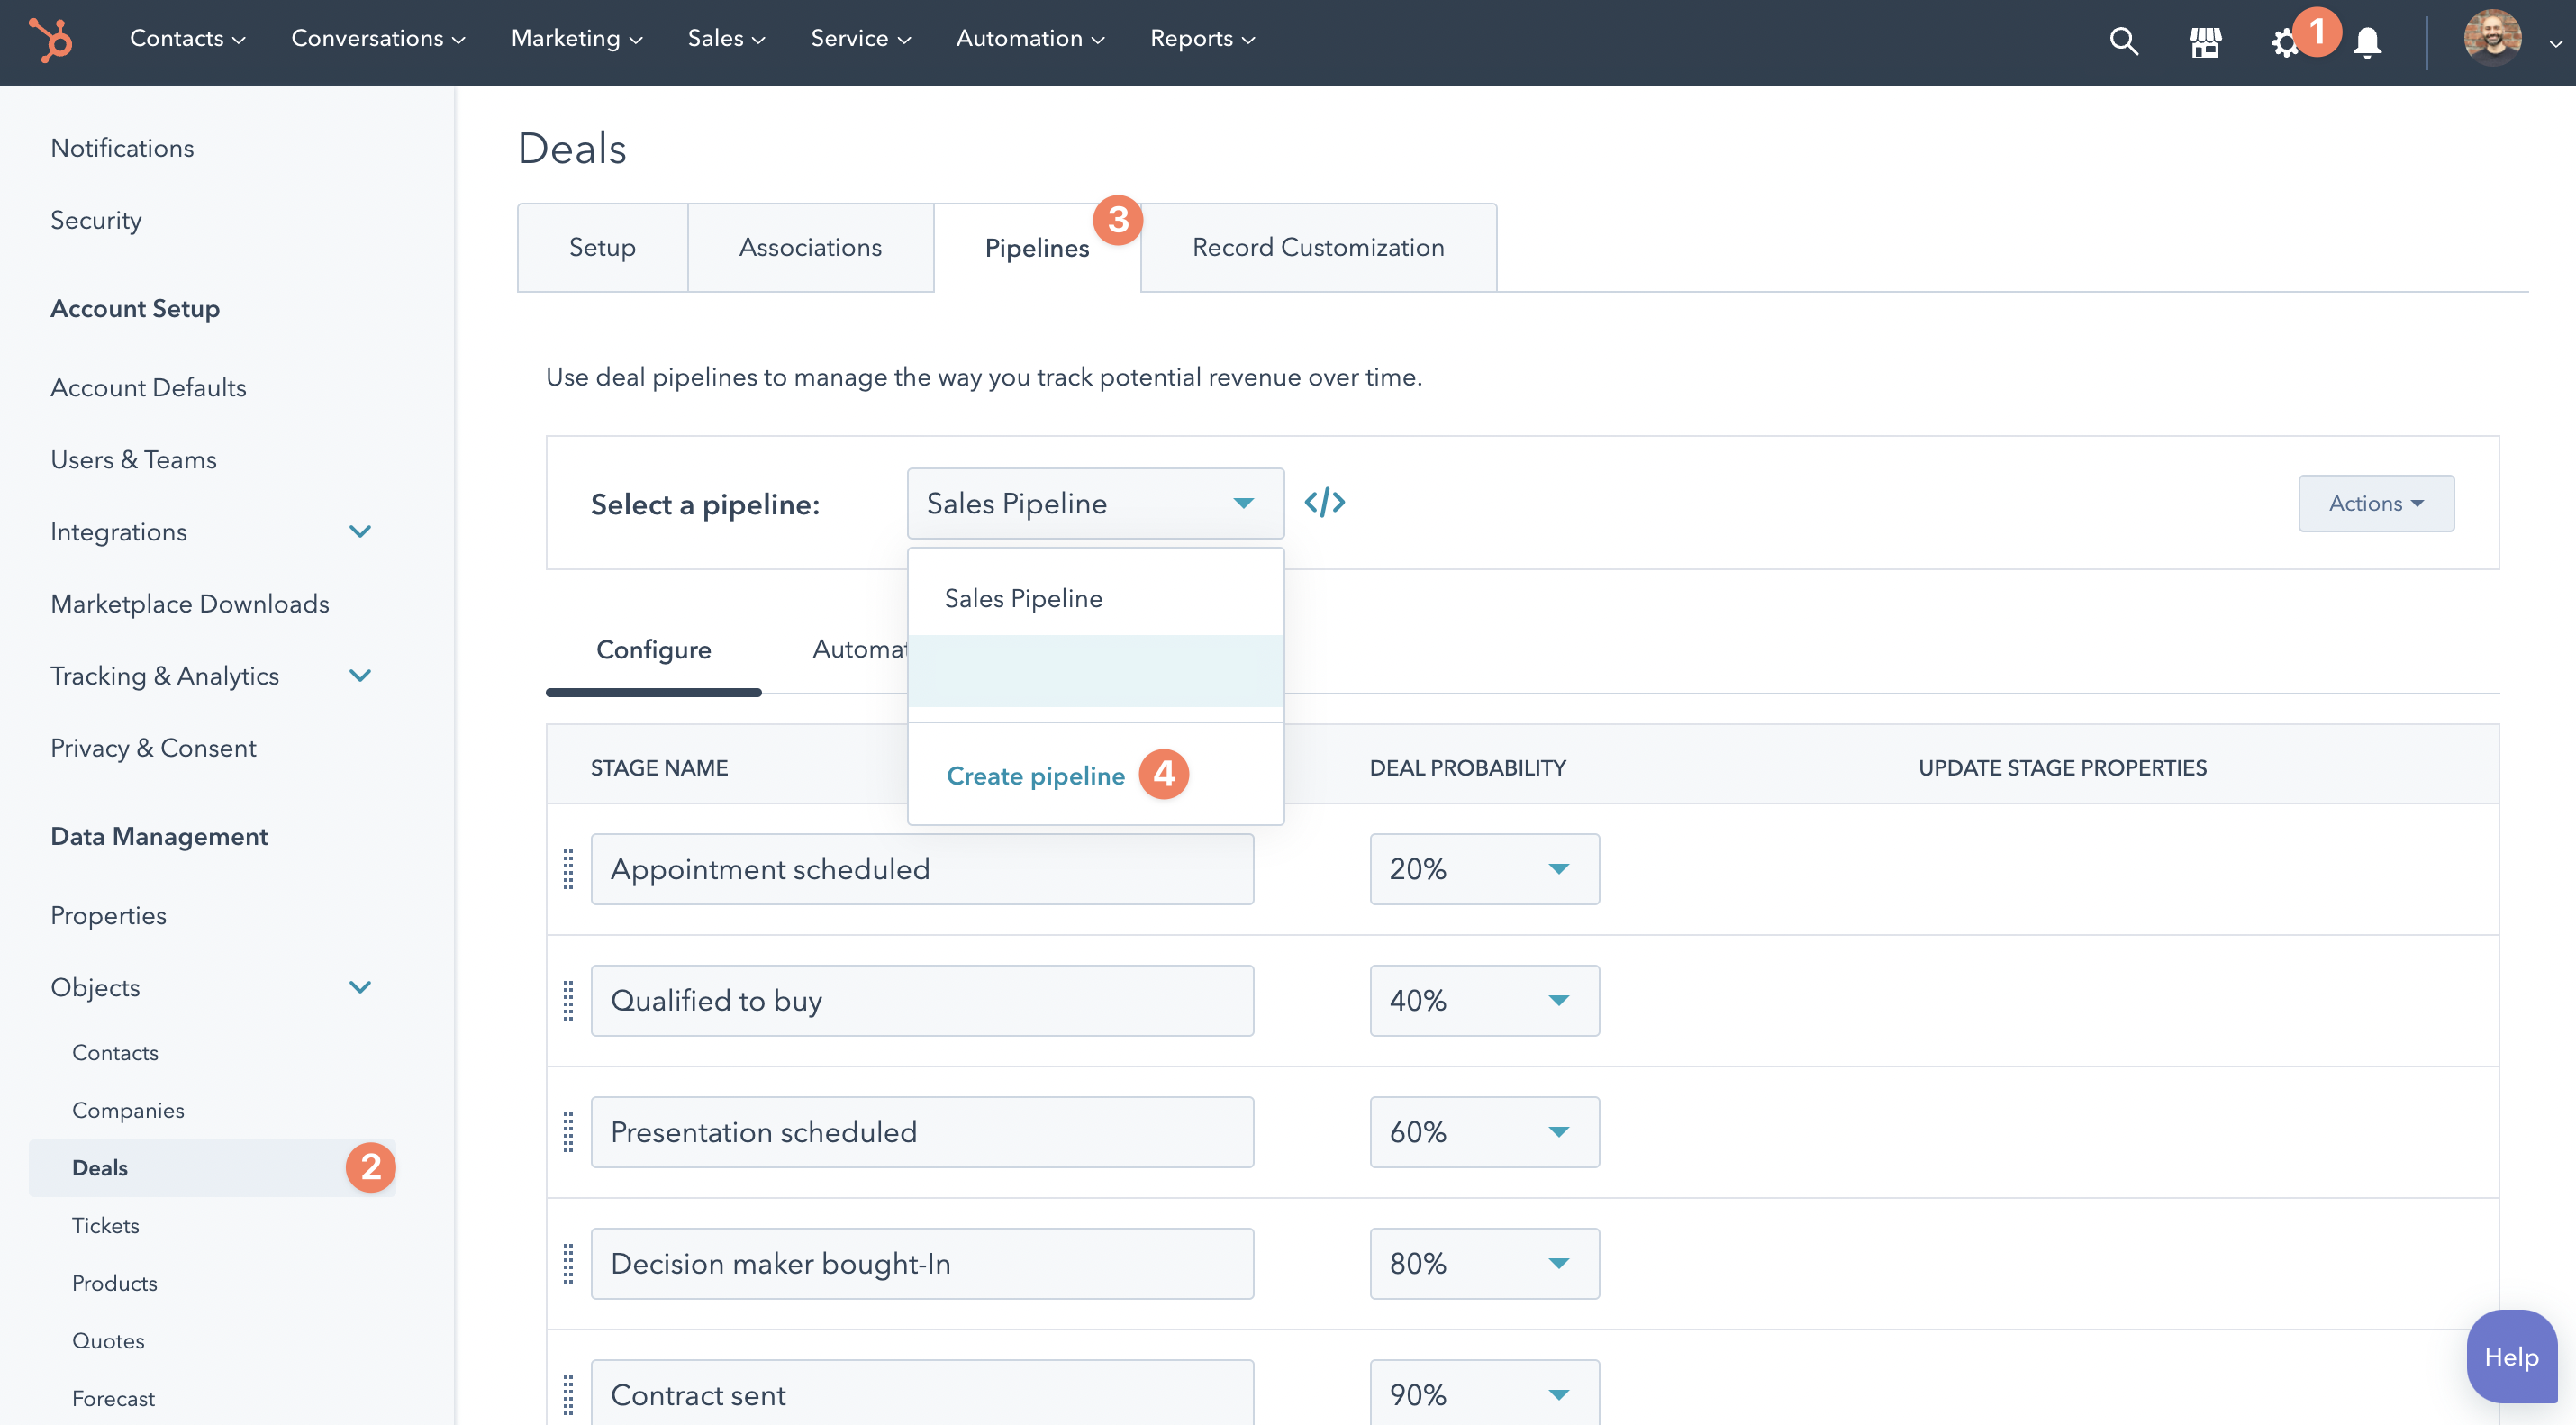
Head to your HubSpot settings, and select the Deals object from the menu on the left.
From the Pipelines tab, use the Select a pipeline menu to Create pipeline
2. Configure your stage names
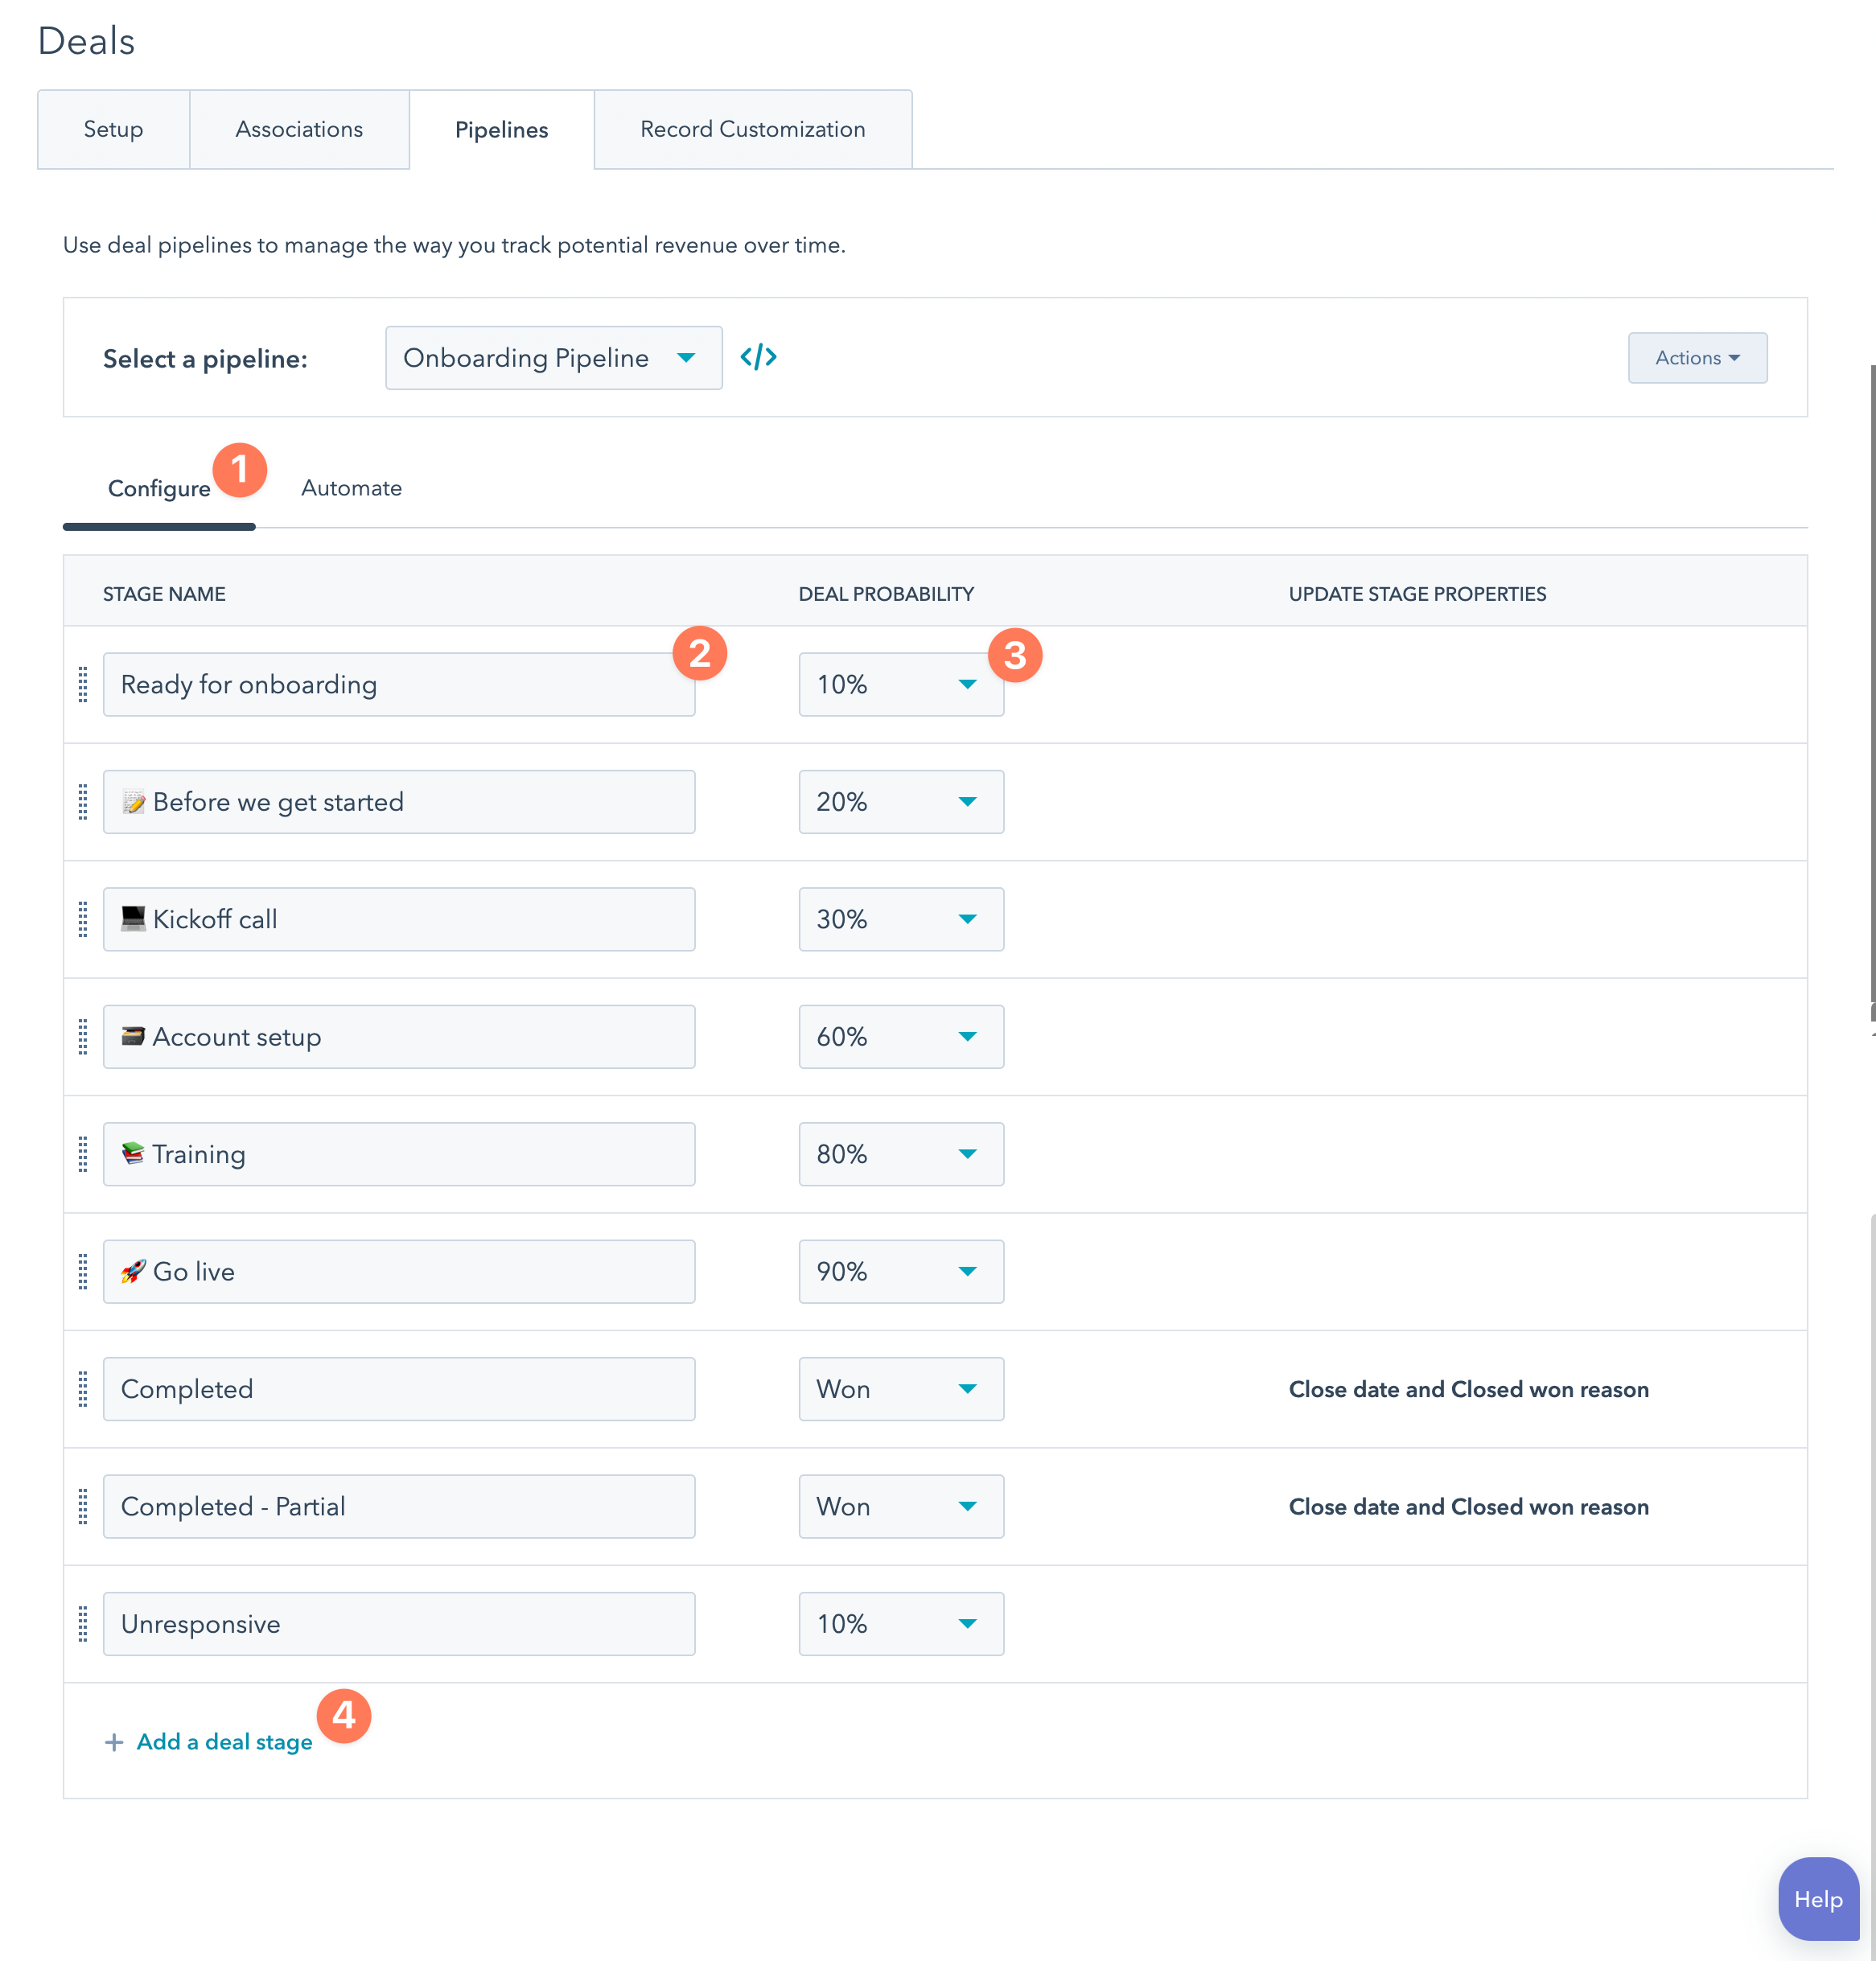
Once the pipeline is created, you’ll want to update the stage names from the Configure tab. We recommend trying to match your stage names to the phases in your onboarding plan/process.
💡
Pro Tip: differentiating which stages are for internal-use versus those that represent where your customer is in the process can be helpful when it comes time for reporting. The image below uses emojis for the customer stages. This can help answer questions like how much time is being spent in parts of your internal process, like “Ready for onboarding” vs how much time a customer is actually in a phase of your onboarding, like “Account setup”?
Deal probability is a sales measure for the likelihood a deal will “close.” Although not necessary for onboarding reporting purposes, it is a required field, so keep the defaults or update them to increase as a customer progresses through your onboarding - we think of this as an increasing the probability a customer will succeed with your product or service.
You can delete extra or add additional stages to match your needs.
This image contains some example stage names commonly used in onboarding pipelines:
3. Edit preset stage properties
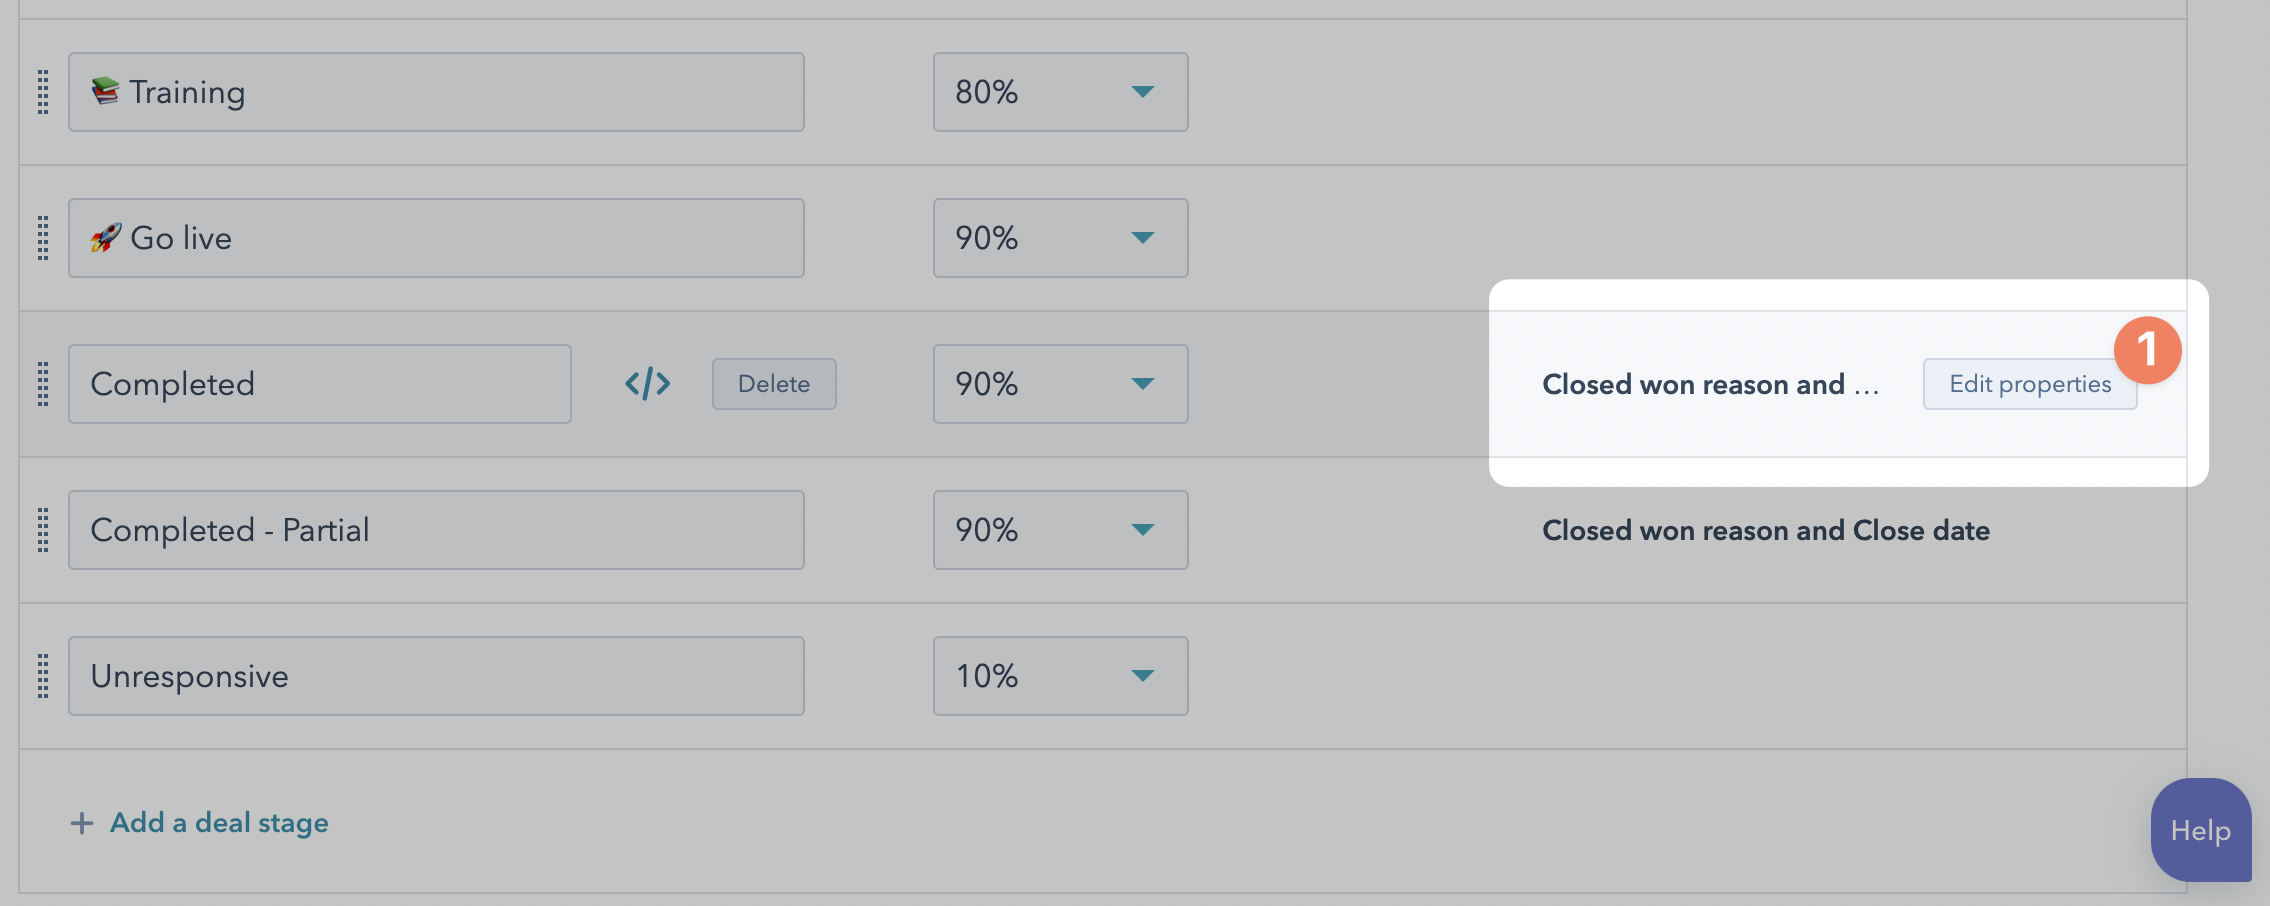
When you create a new pipeline, certain stages might be preset with required fields (Closed won reason and Close date in the image below).
Required fields can become handy later, but for now, you’ll want to delete the preset ones.
To remove those, hover over the stage name and select the Edit properties button.
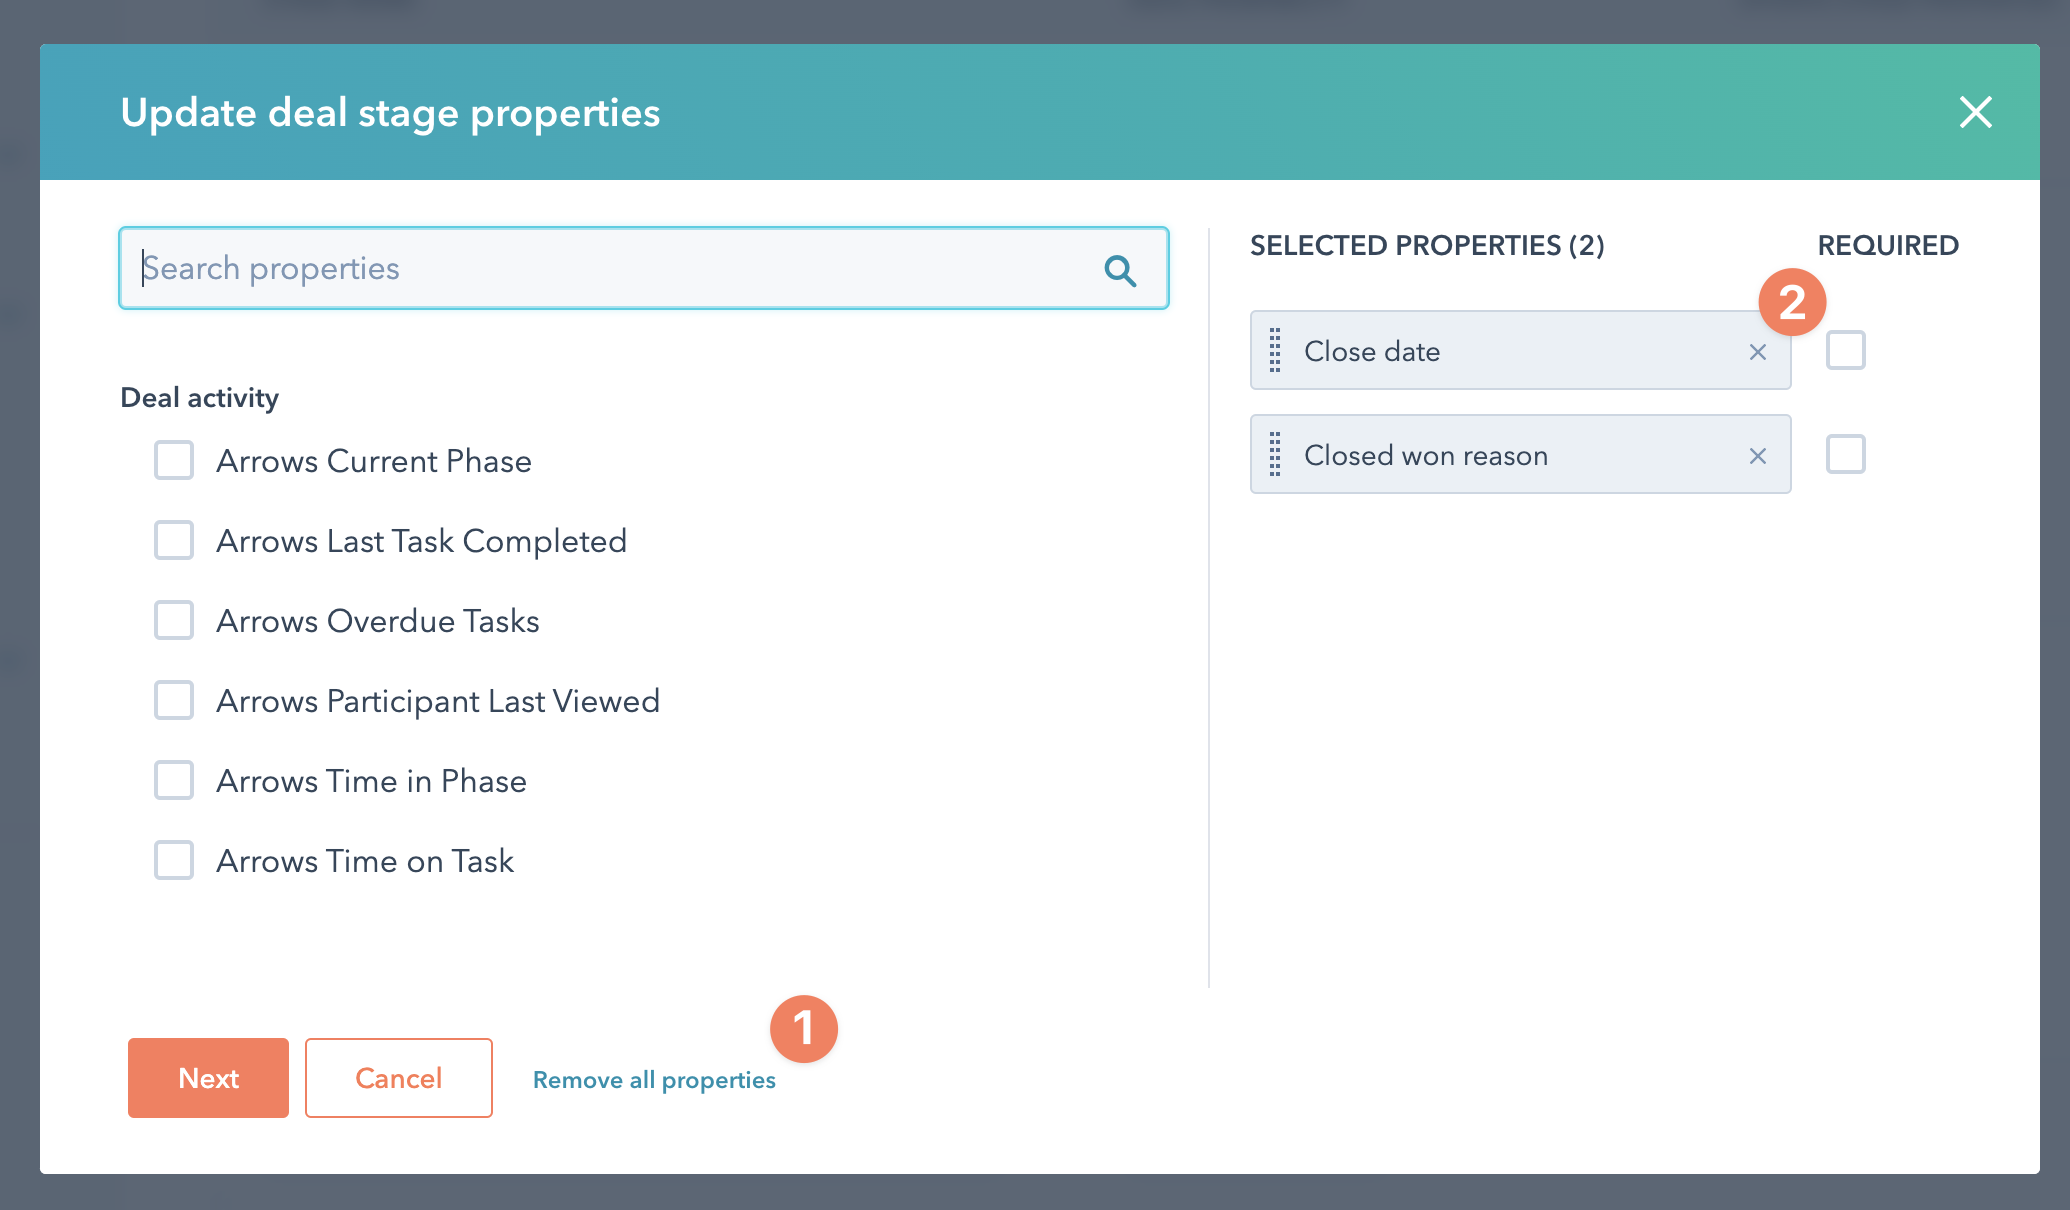
From the Edit properties screen that pops up, select Remove all properties (or remove them individually from the right) and press the orange Next button.
Be sure to press the orange Save button when you get redirected to the settings tab to properly delete the required fields.
4. View the pipeline you just created
Once you press Save, select the main Sales menu at the top of the screen and head to the Deals page to see your onboarding pipeline

5. Use the board view to track onboarding progress
Select the option to view your deals on the board and select your newly created onboarding pipeline.
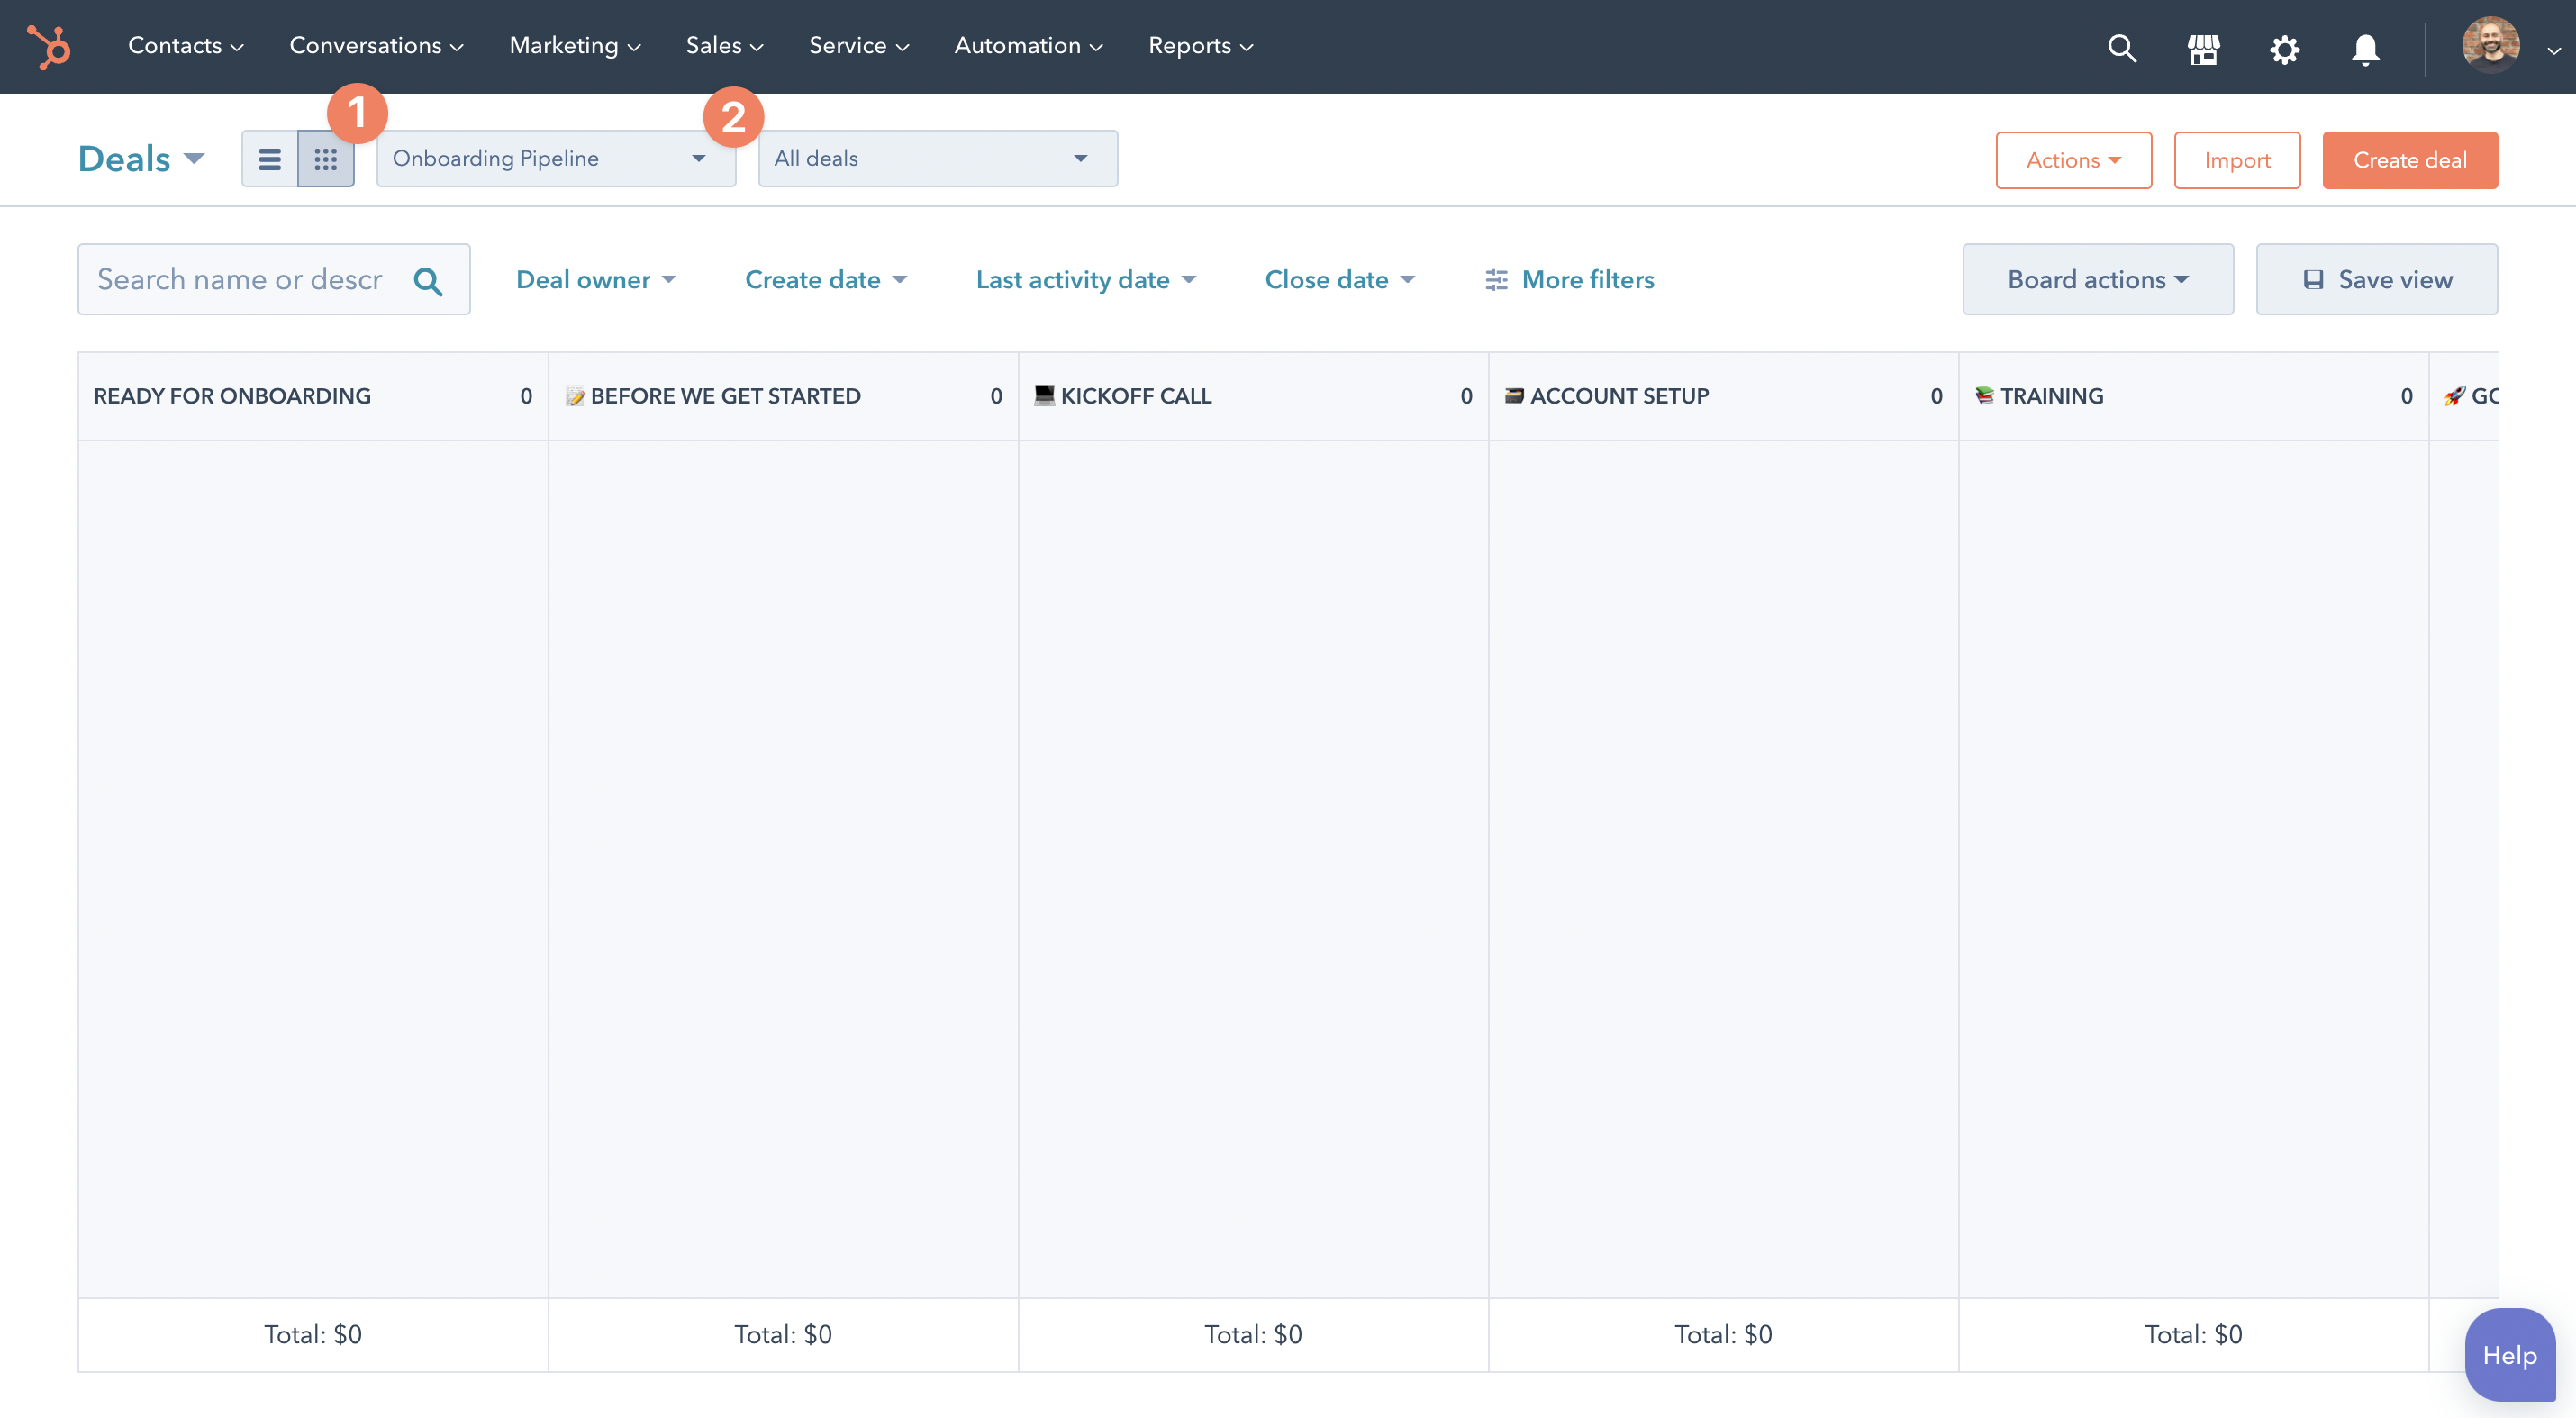
Next time a customer is ready for onboarding, you can create an onboarding deal for that company and attach it to your onboarding pipeline