
Onboarding plans overview page
An overview of how to navigate and customize the Onboarding plans overview page in Arrows.
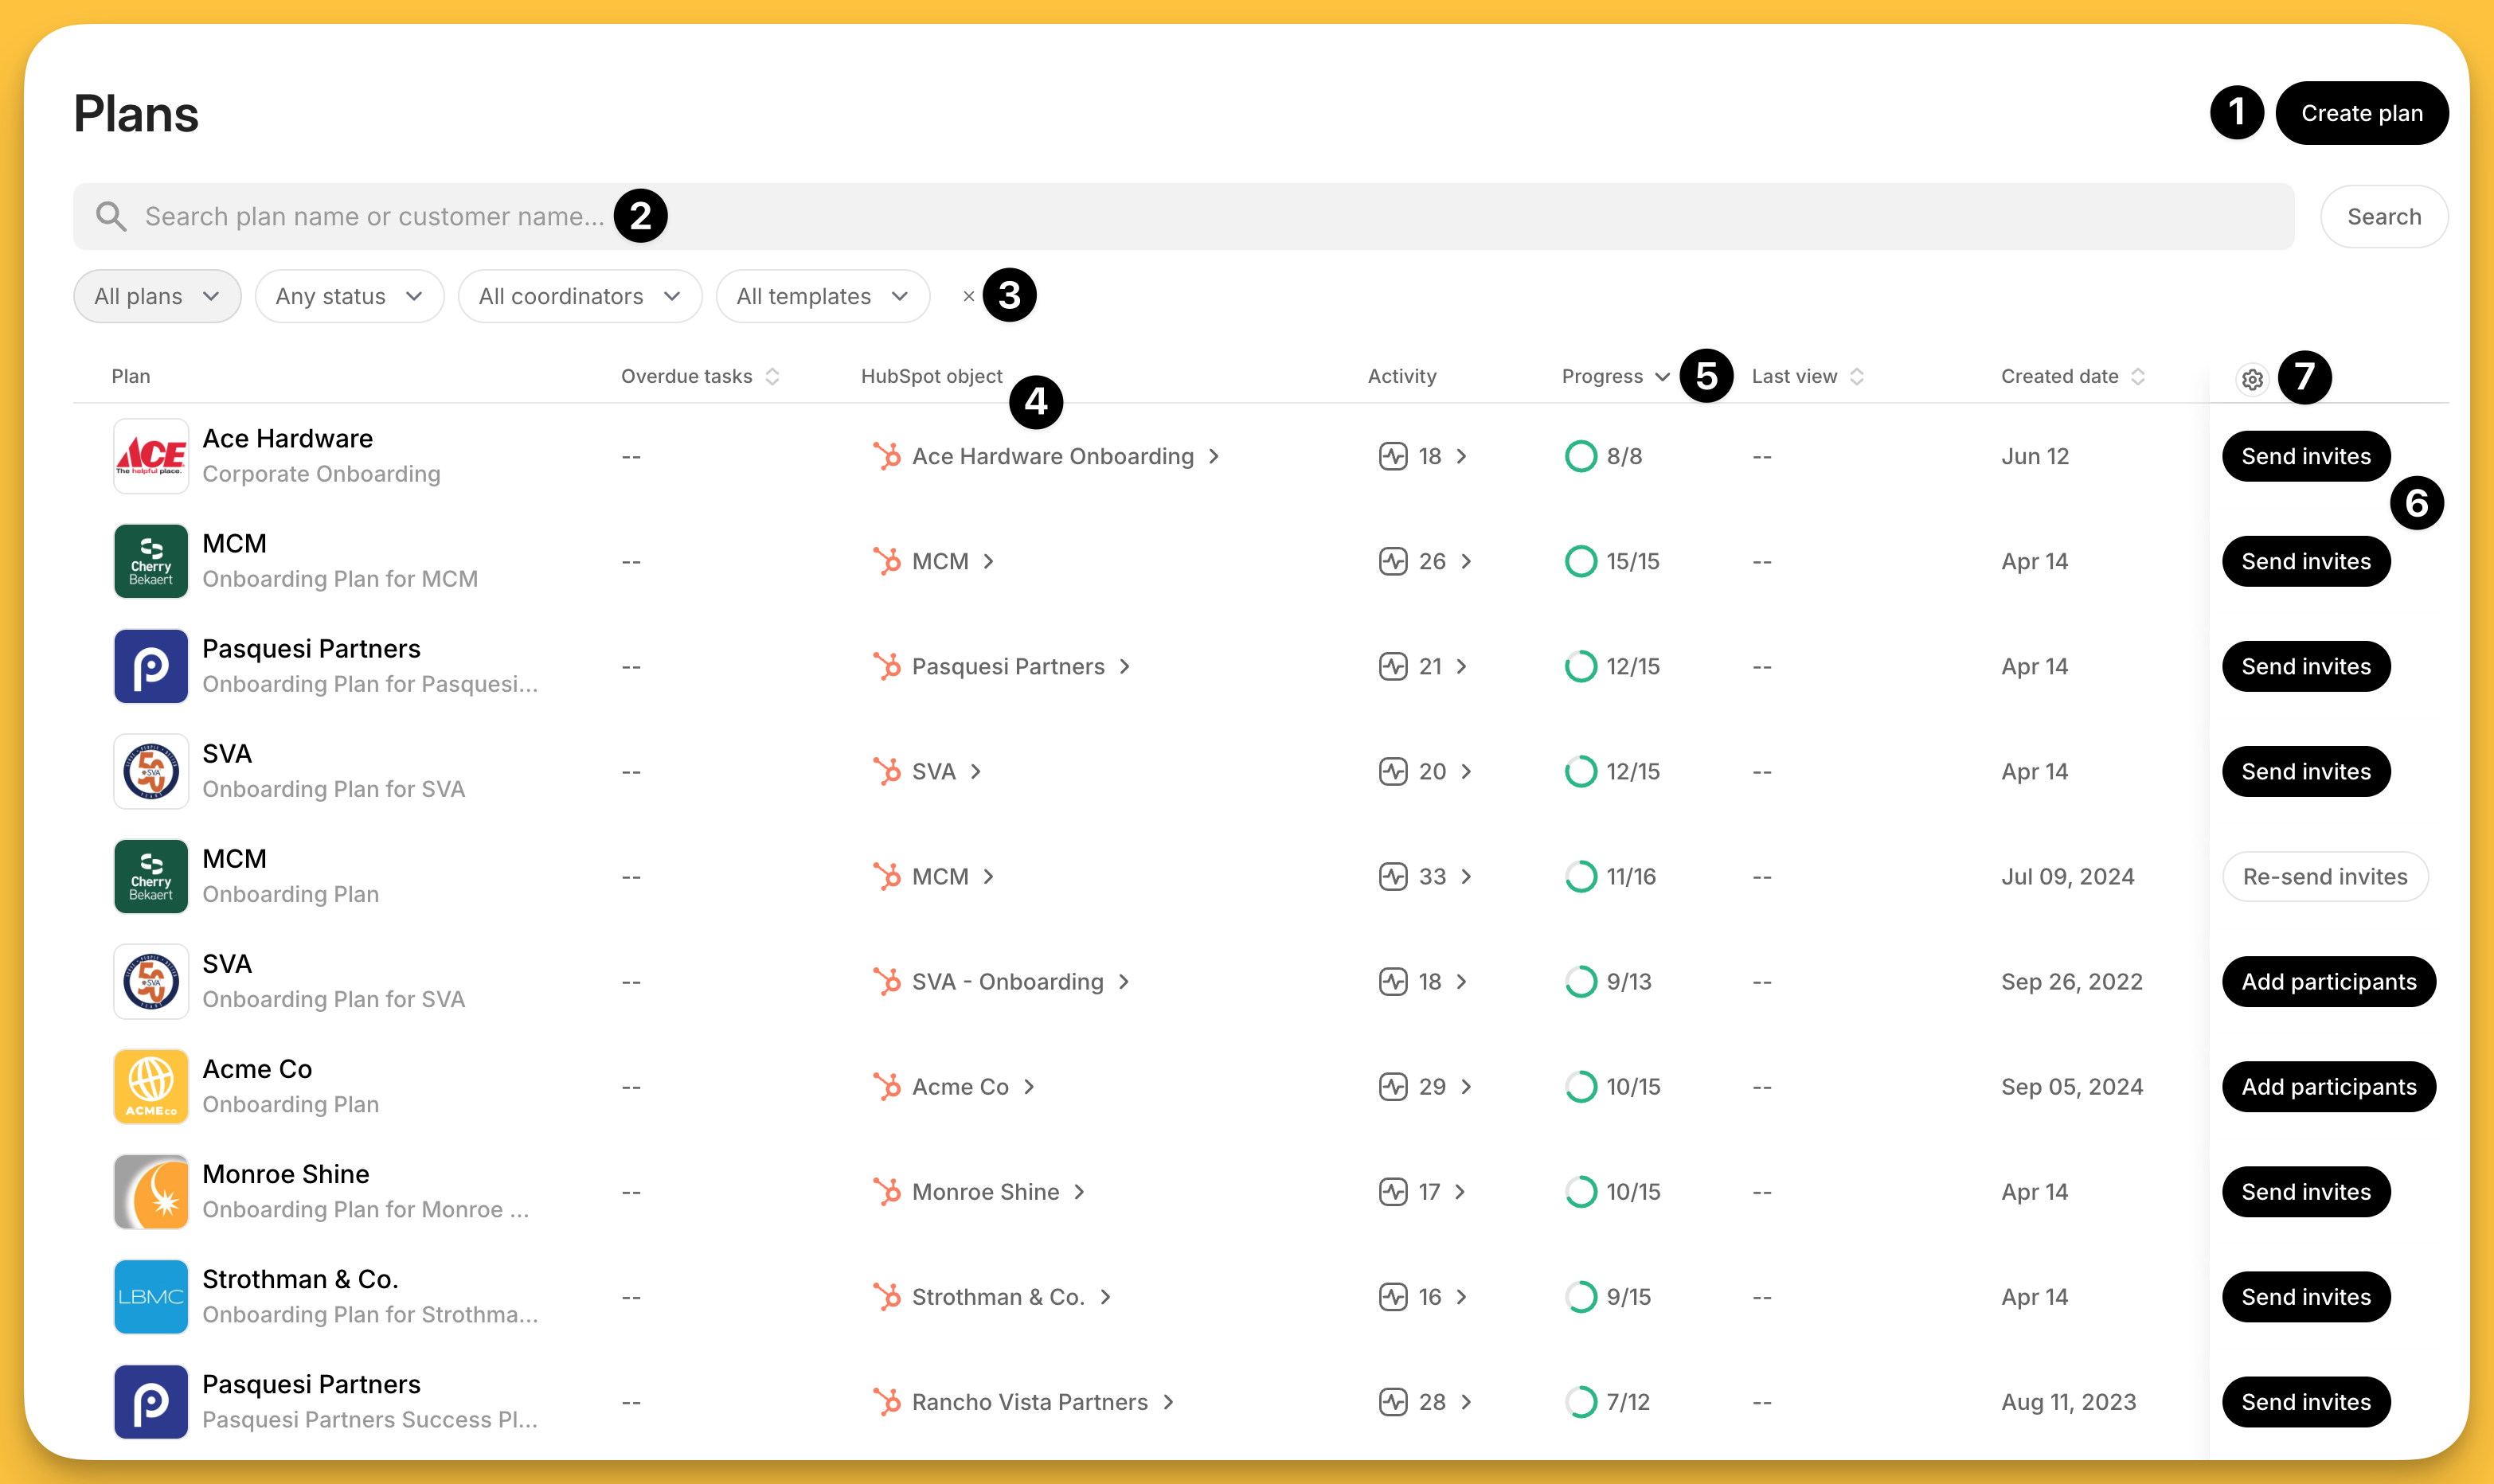
The Plans page in Arrows is your overview for all of your onboarding plans.
Each Arrows user can customize this page for their own needs and access critical information from one spot!
Clicking the name of the plan from this page will take you directly to that specific plan.
Let’s cover some of the key functionality of this page…
Overview
The Plans page in Arrows is your dashboard for accessing and viewing information about your plans (or your team’s plans if you are a manager)
This view is specific to each user in Arrows - whatever you save or filter will only apply to YOU!
From this page, you have the ability to:
create new plans
search for specific customers
adjust key filters to focus on what you need
access the HubSpot record associated with your plan (if you’re displaying this column)
sort specific columns (look for sorting arrows)
take action on the status of your plan invites
and, add additional data to customize your view!
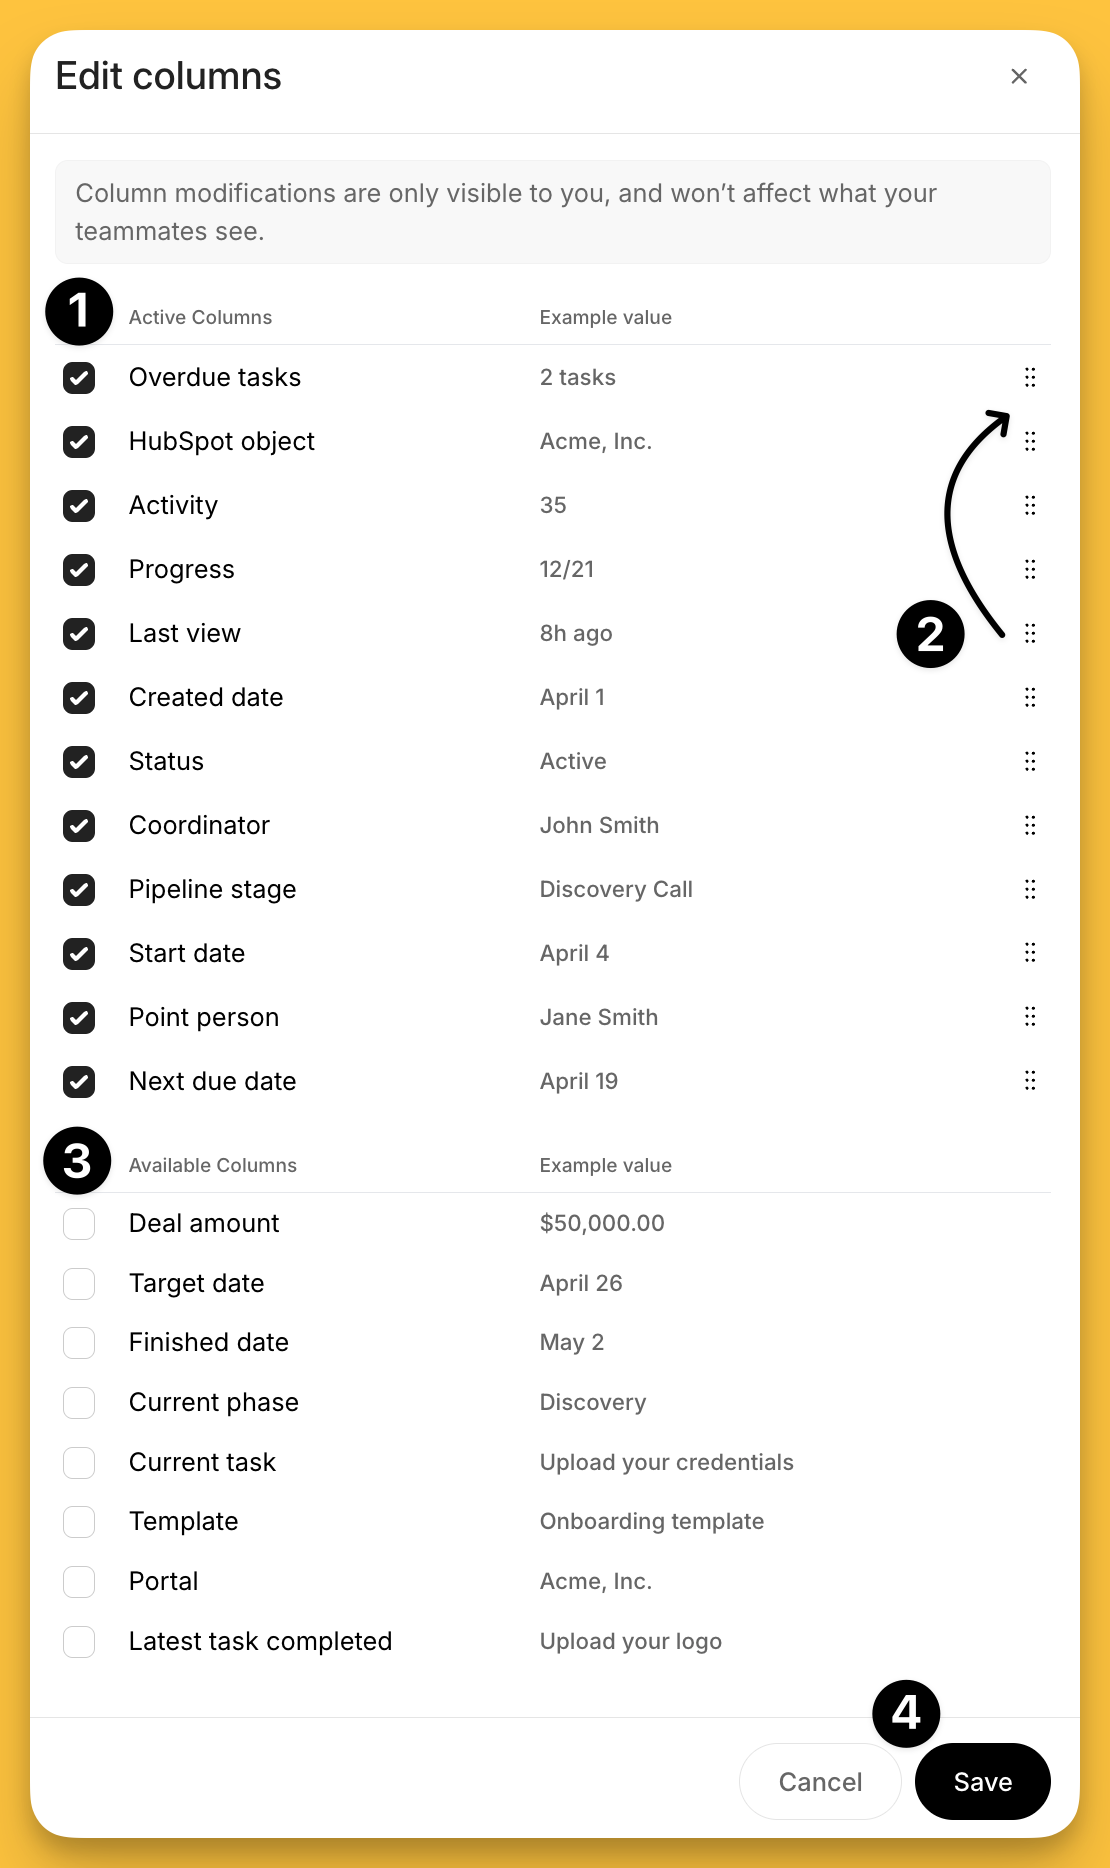
Adding additional data columns
You can adjust what data appears on this page by clicking the settings icon (step 7 in the overview section).
From this drawer, you’ll have the ability to:
adjust what data is currently displayed
re-arrange the order of your columns on the overview page
add additional data points
and, save your changes
Invite plan participants
From the overview page, you can take action on the status of your plan participants (step 6 in the overview section).
This column is locked in place for everyone - it’s critical to make sure your customers are aware of and accessing their plans.
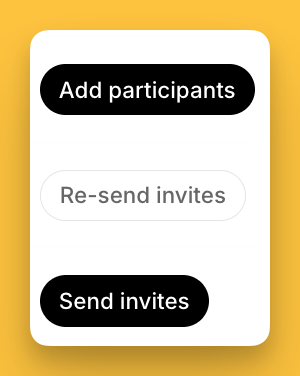
The different call-to-action buttons indicate a quick status for the plan invites AND let you take action.
You’ll have the ability to:
Add participants - if a plan has been created but no one has been added to it
Re-send invites - if a plan invite has been sent but the participants did not open the plan
Send invites - if participants have been added but the initial invite has never been sent
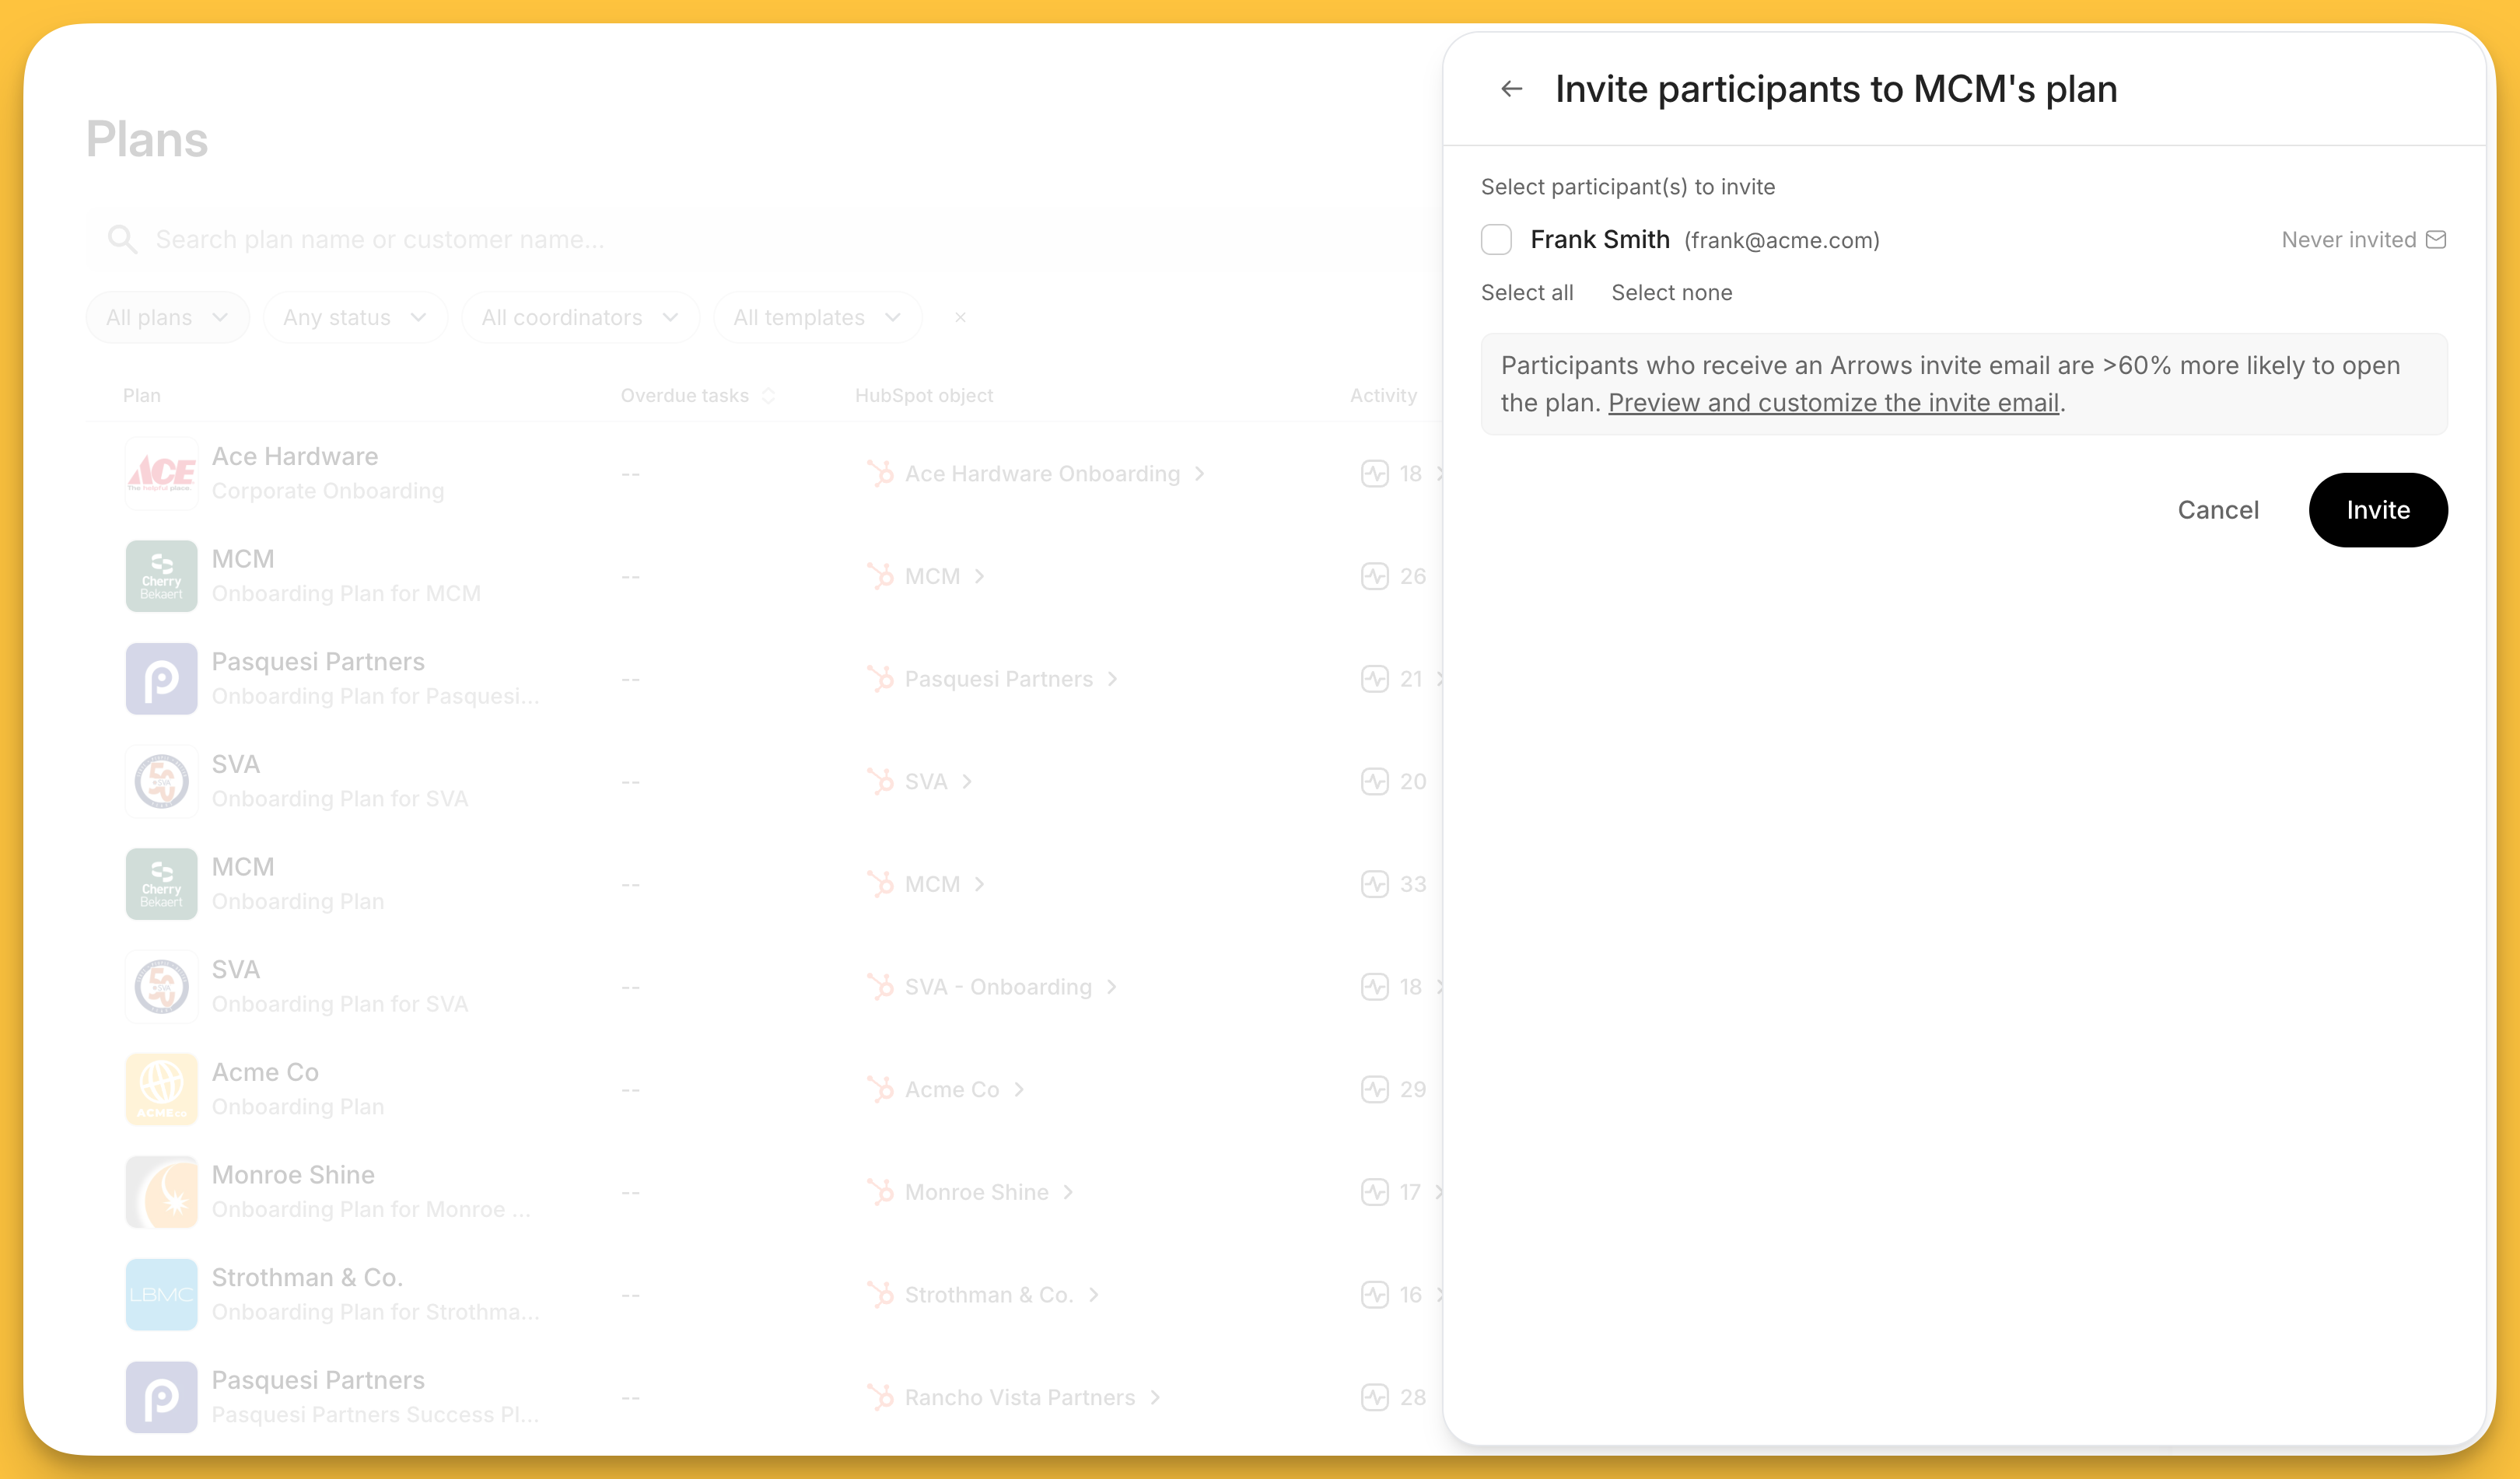
Clicking one of these call-to-action buttons will let you take that action for that customer, without leaving this page.
Here is an example of clicking the Send invites action for one of the plans in our overview - letting you quickly send an invitation email and get back to your overview page!
Be sure to customize the Plans page for your specific needs so you can keep your customer onboarding progress moving forward!