
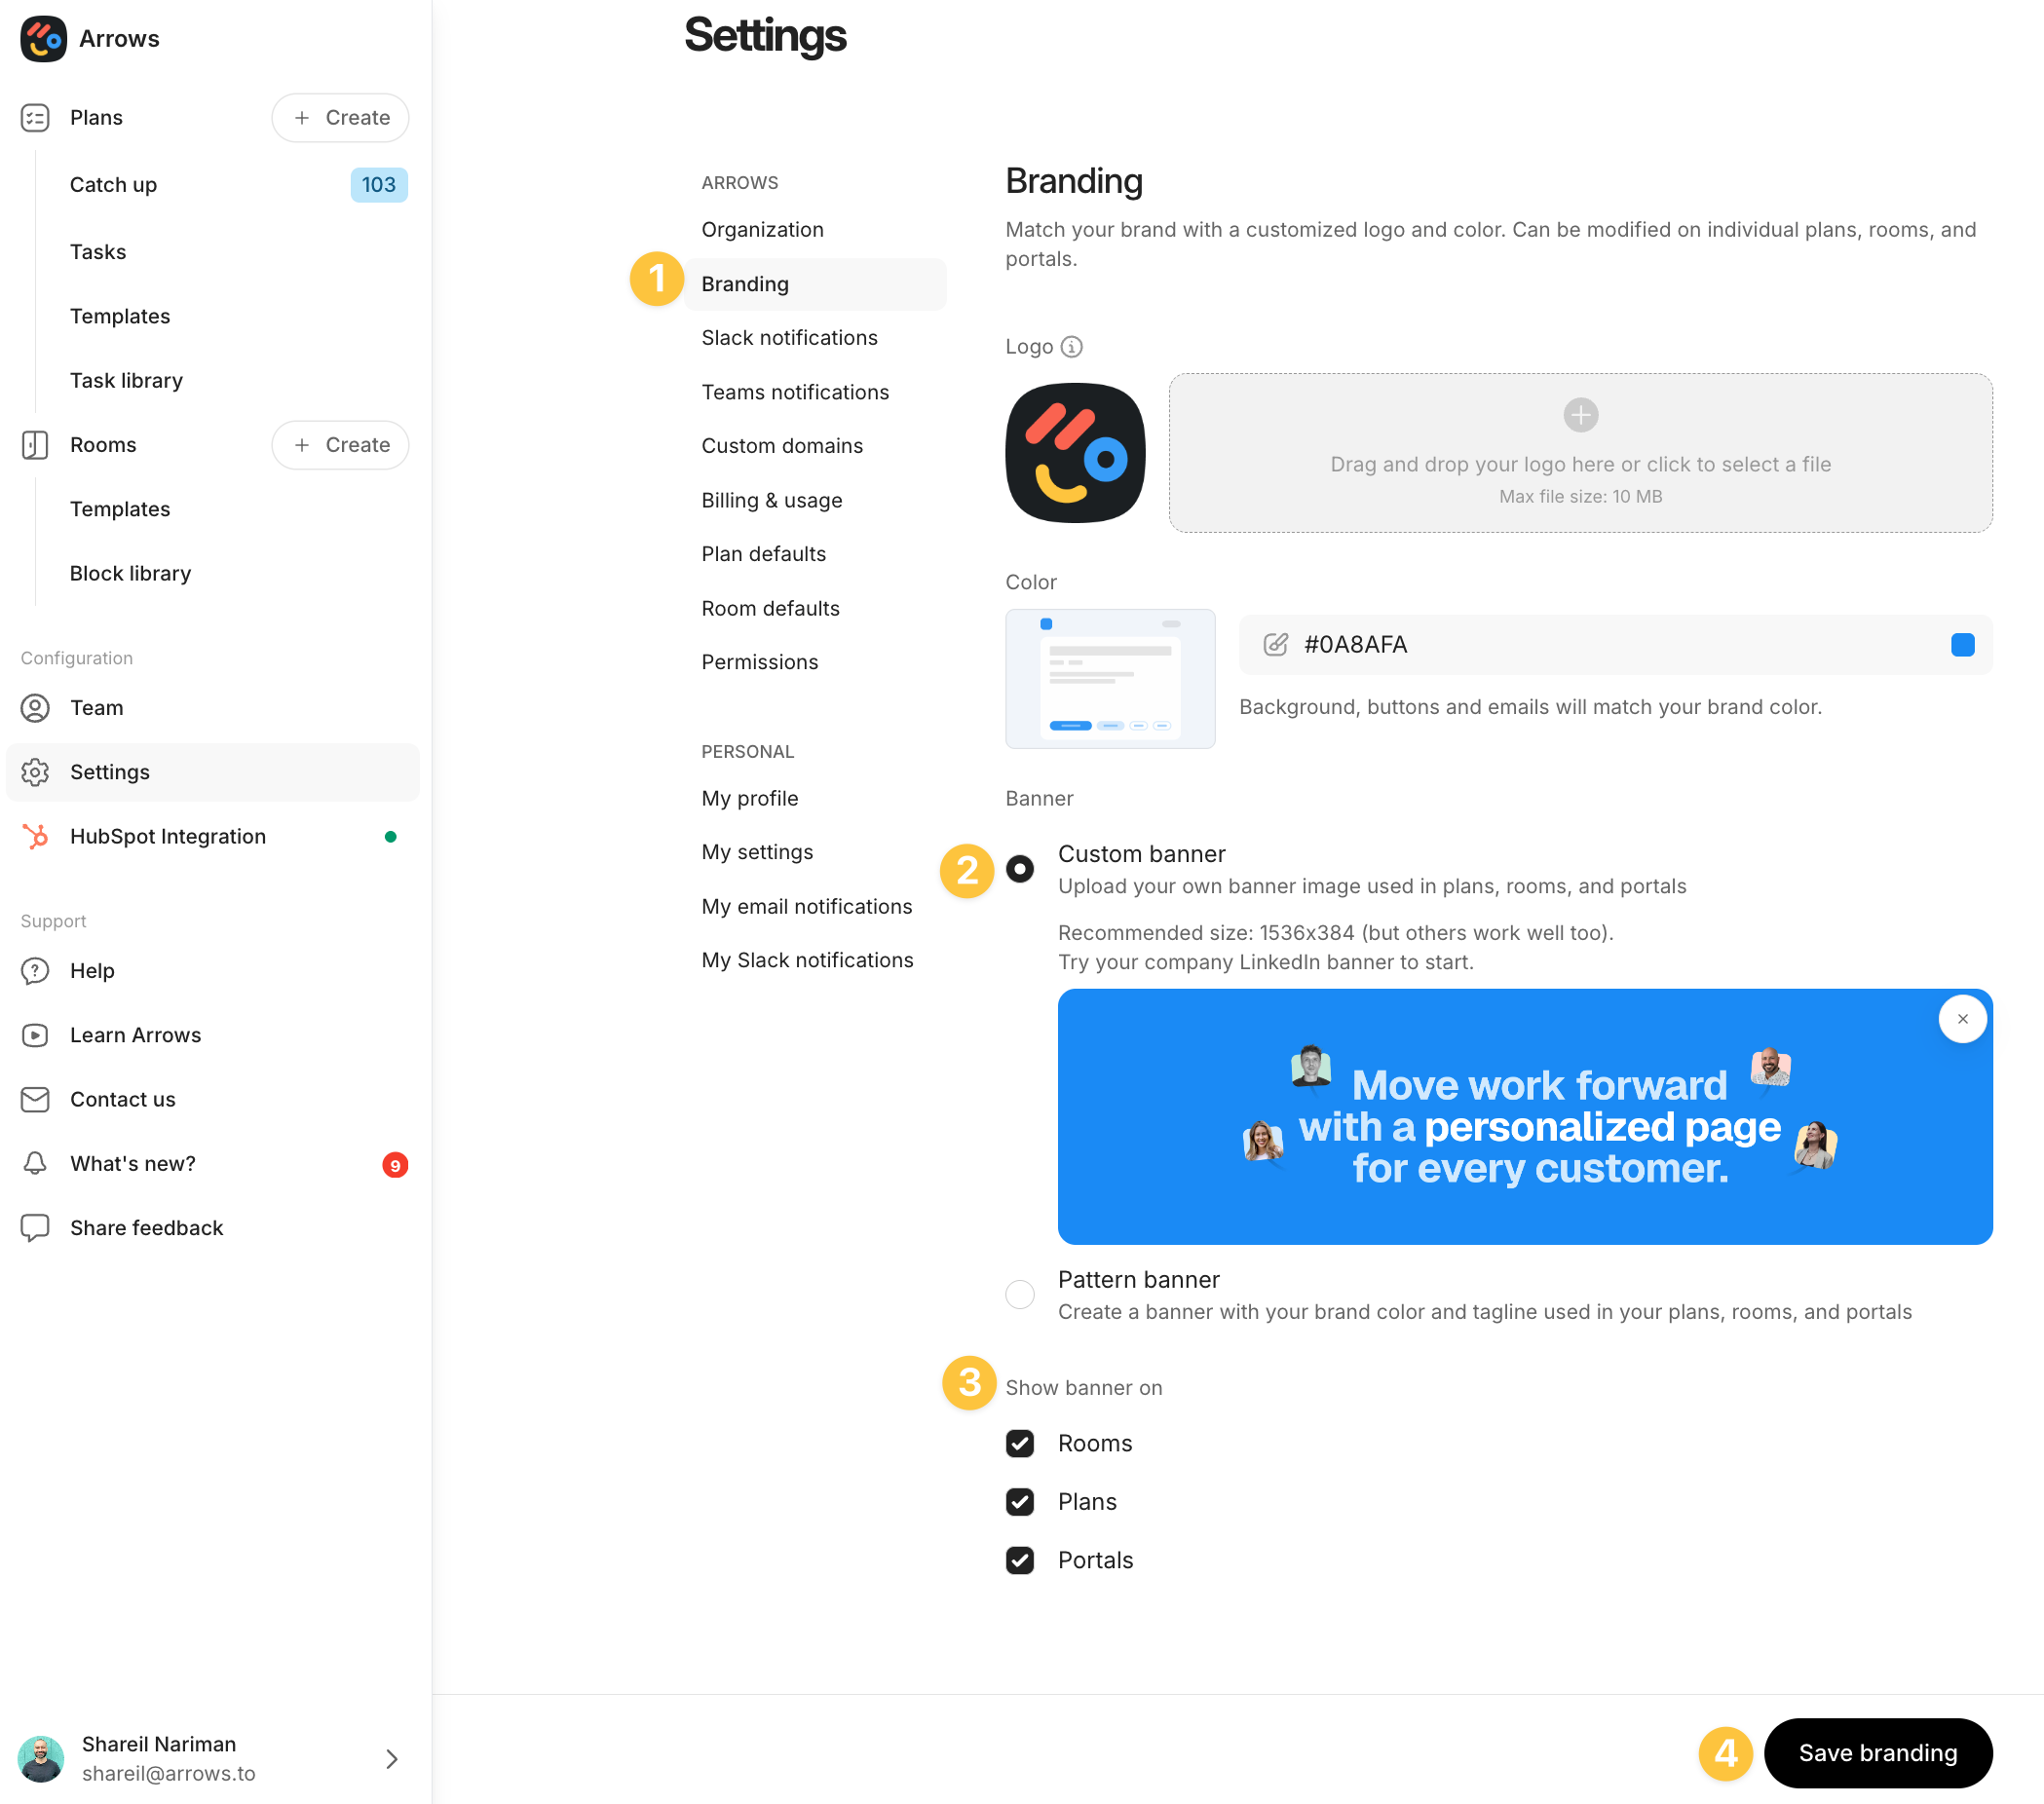
Adding brand banners to your sales rooms, onboarding plans, and customer portals
Set up a custom banner across sales rooms (and templates), onboarding plans (and templates), and client portals to give your prospects and customers a consistent, polished experience from first touch to go-live.
How to add your custom banner
Go to the Branding page of your Settings in your Arrows account (click here)
Upload your custom banner
Recommended size: 1536 x 384 (but others work well too)
You can try your LinkedIn banner to start
Scroll to the Show banner on section and toggle on:
Sales Rooms ✅
Onboarding Plans ✅
Portals ✅
Click Save branding
That's it! Your rooms, plans, and portals will now display a unified, branded banner.
💡Pro tip: You can still override banner settings on individual plans or rooms if needed. This is great if you run different product lines or whitelabeled implementations.
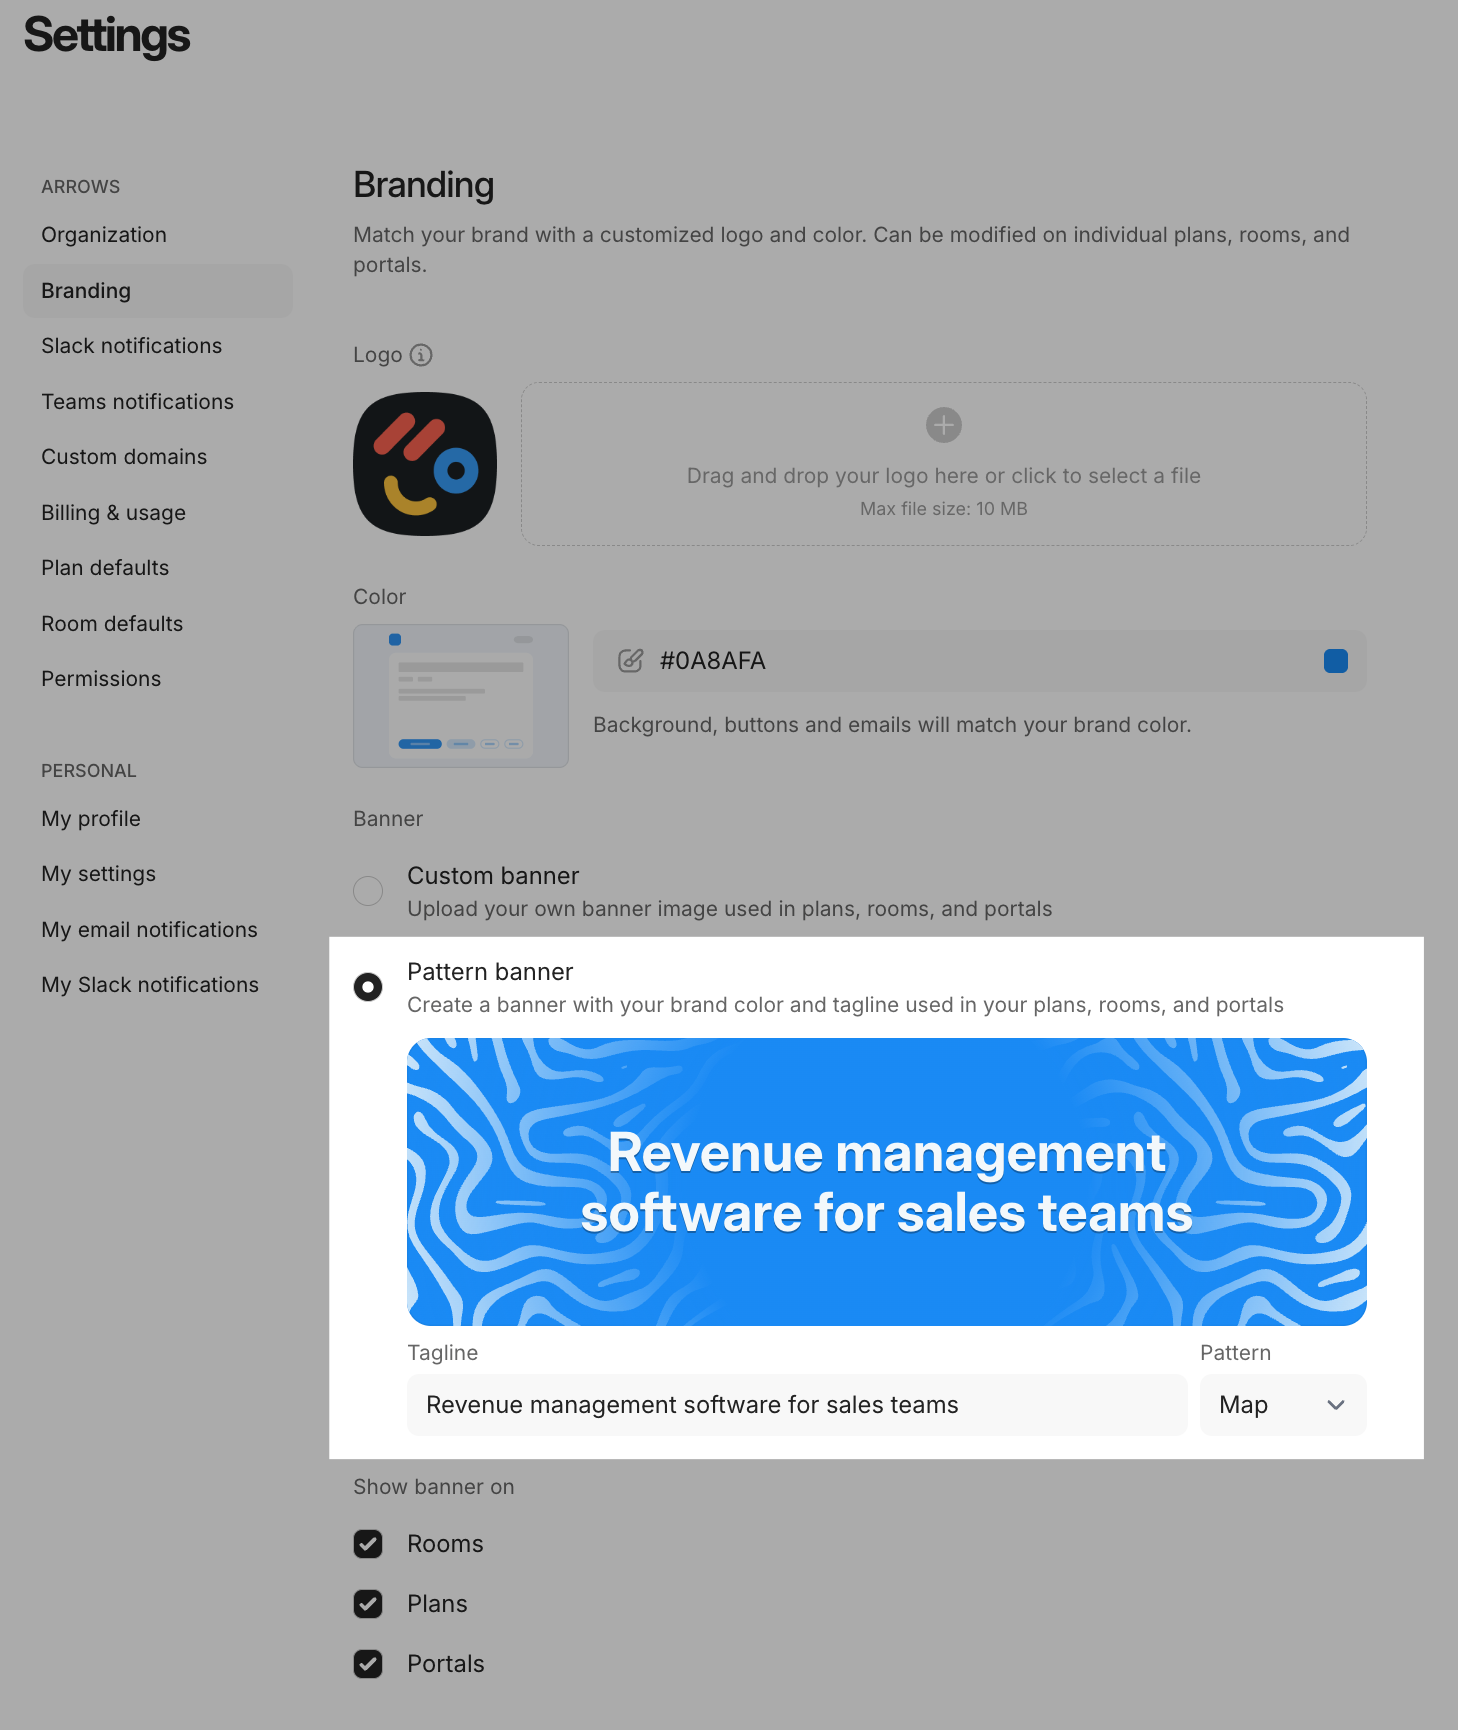
You can also use a pattern banner - a clean strip with your brand color and a short tagline. It’s a lightweight way to keep things on-brand across all your rooms, plans, and portals.
Here is an example of the banner applied to the top of on onboarding plan:
