
Using Dynamic Text Tags to Create Variable Links
Make links and buttons in your Arrows tasks automatically pull unique IDs and parameters from your CRM, eliminating manual updates for each customer.
Overview
When you need links or buttons that direct customers to unique pages (like their specific HubSpot portal, account dashboard, or custom URL), you can use dynamic text tags instead of hardcoding IDs into each task.
This means you set it up once in your plan template, and Arrows automatically pulls the correct ID from each customer's CRM record.
Common use cases:
Links to customer-specific dashboards or sites
Account access buttons with unique account IDs
Custom dashboard URLs with variable parameters
Any link where part of the URL needs to change per customer
Prerequisites
A plan synced to a HubSpot record
A HubSpot property to store the variable ID or parameter you need
Step 1: Create the Property in HubSpot
First, ensure you have a property in HubSpot to store the variable information.
In HubSpot, create a property on the object your plan syncs to (deal, ticket, service, project, or custom object)
Choose the appropriate property type (usually "Single-line text" for IDs)
Name it clearly (e.g. "Account ID")
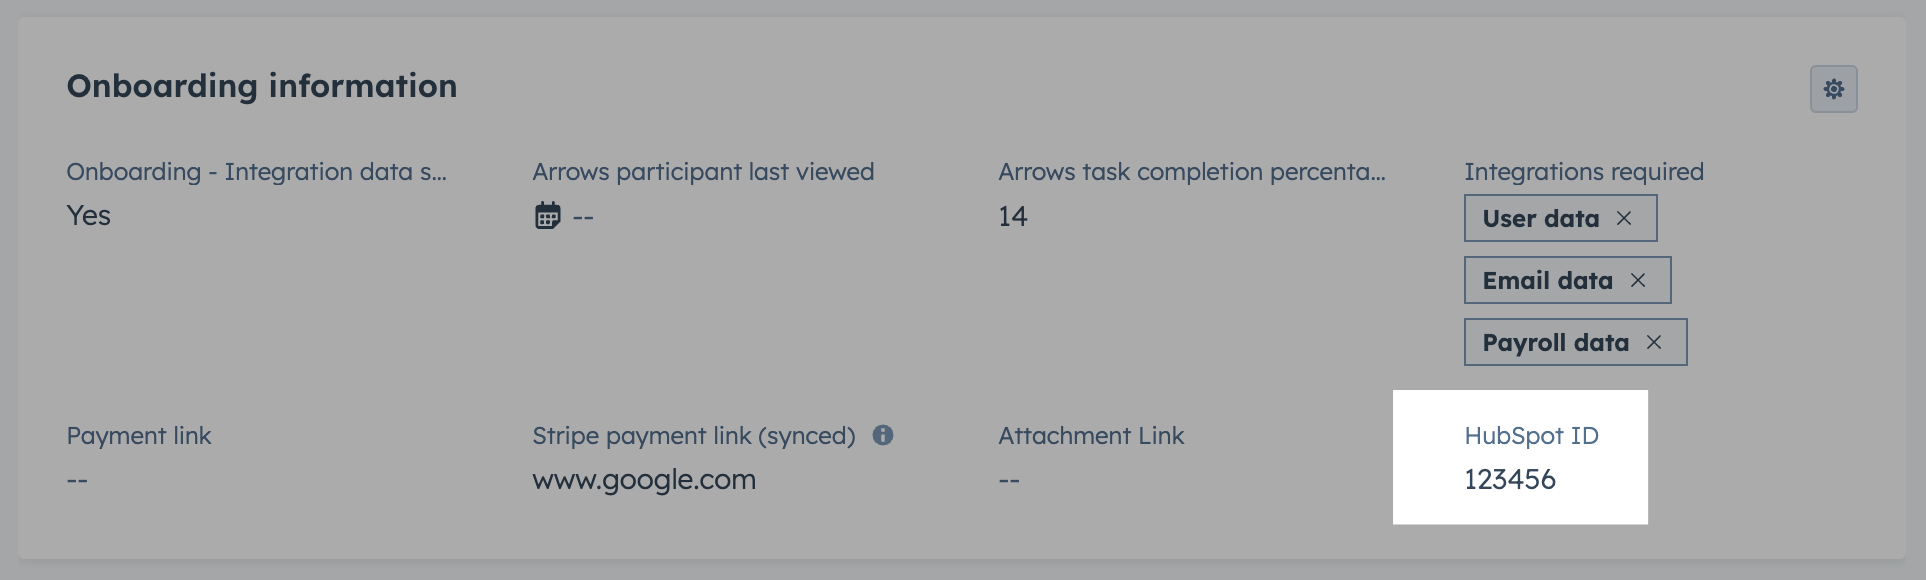
In this example we are using a property for a HubSpot ID:
Step 2: Find the Dynamic Text Tag in Arrows
Navigate to your plan template where you want to add the dynamic link.
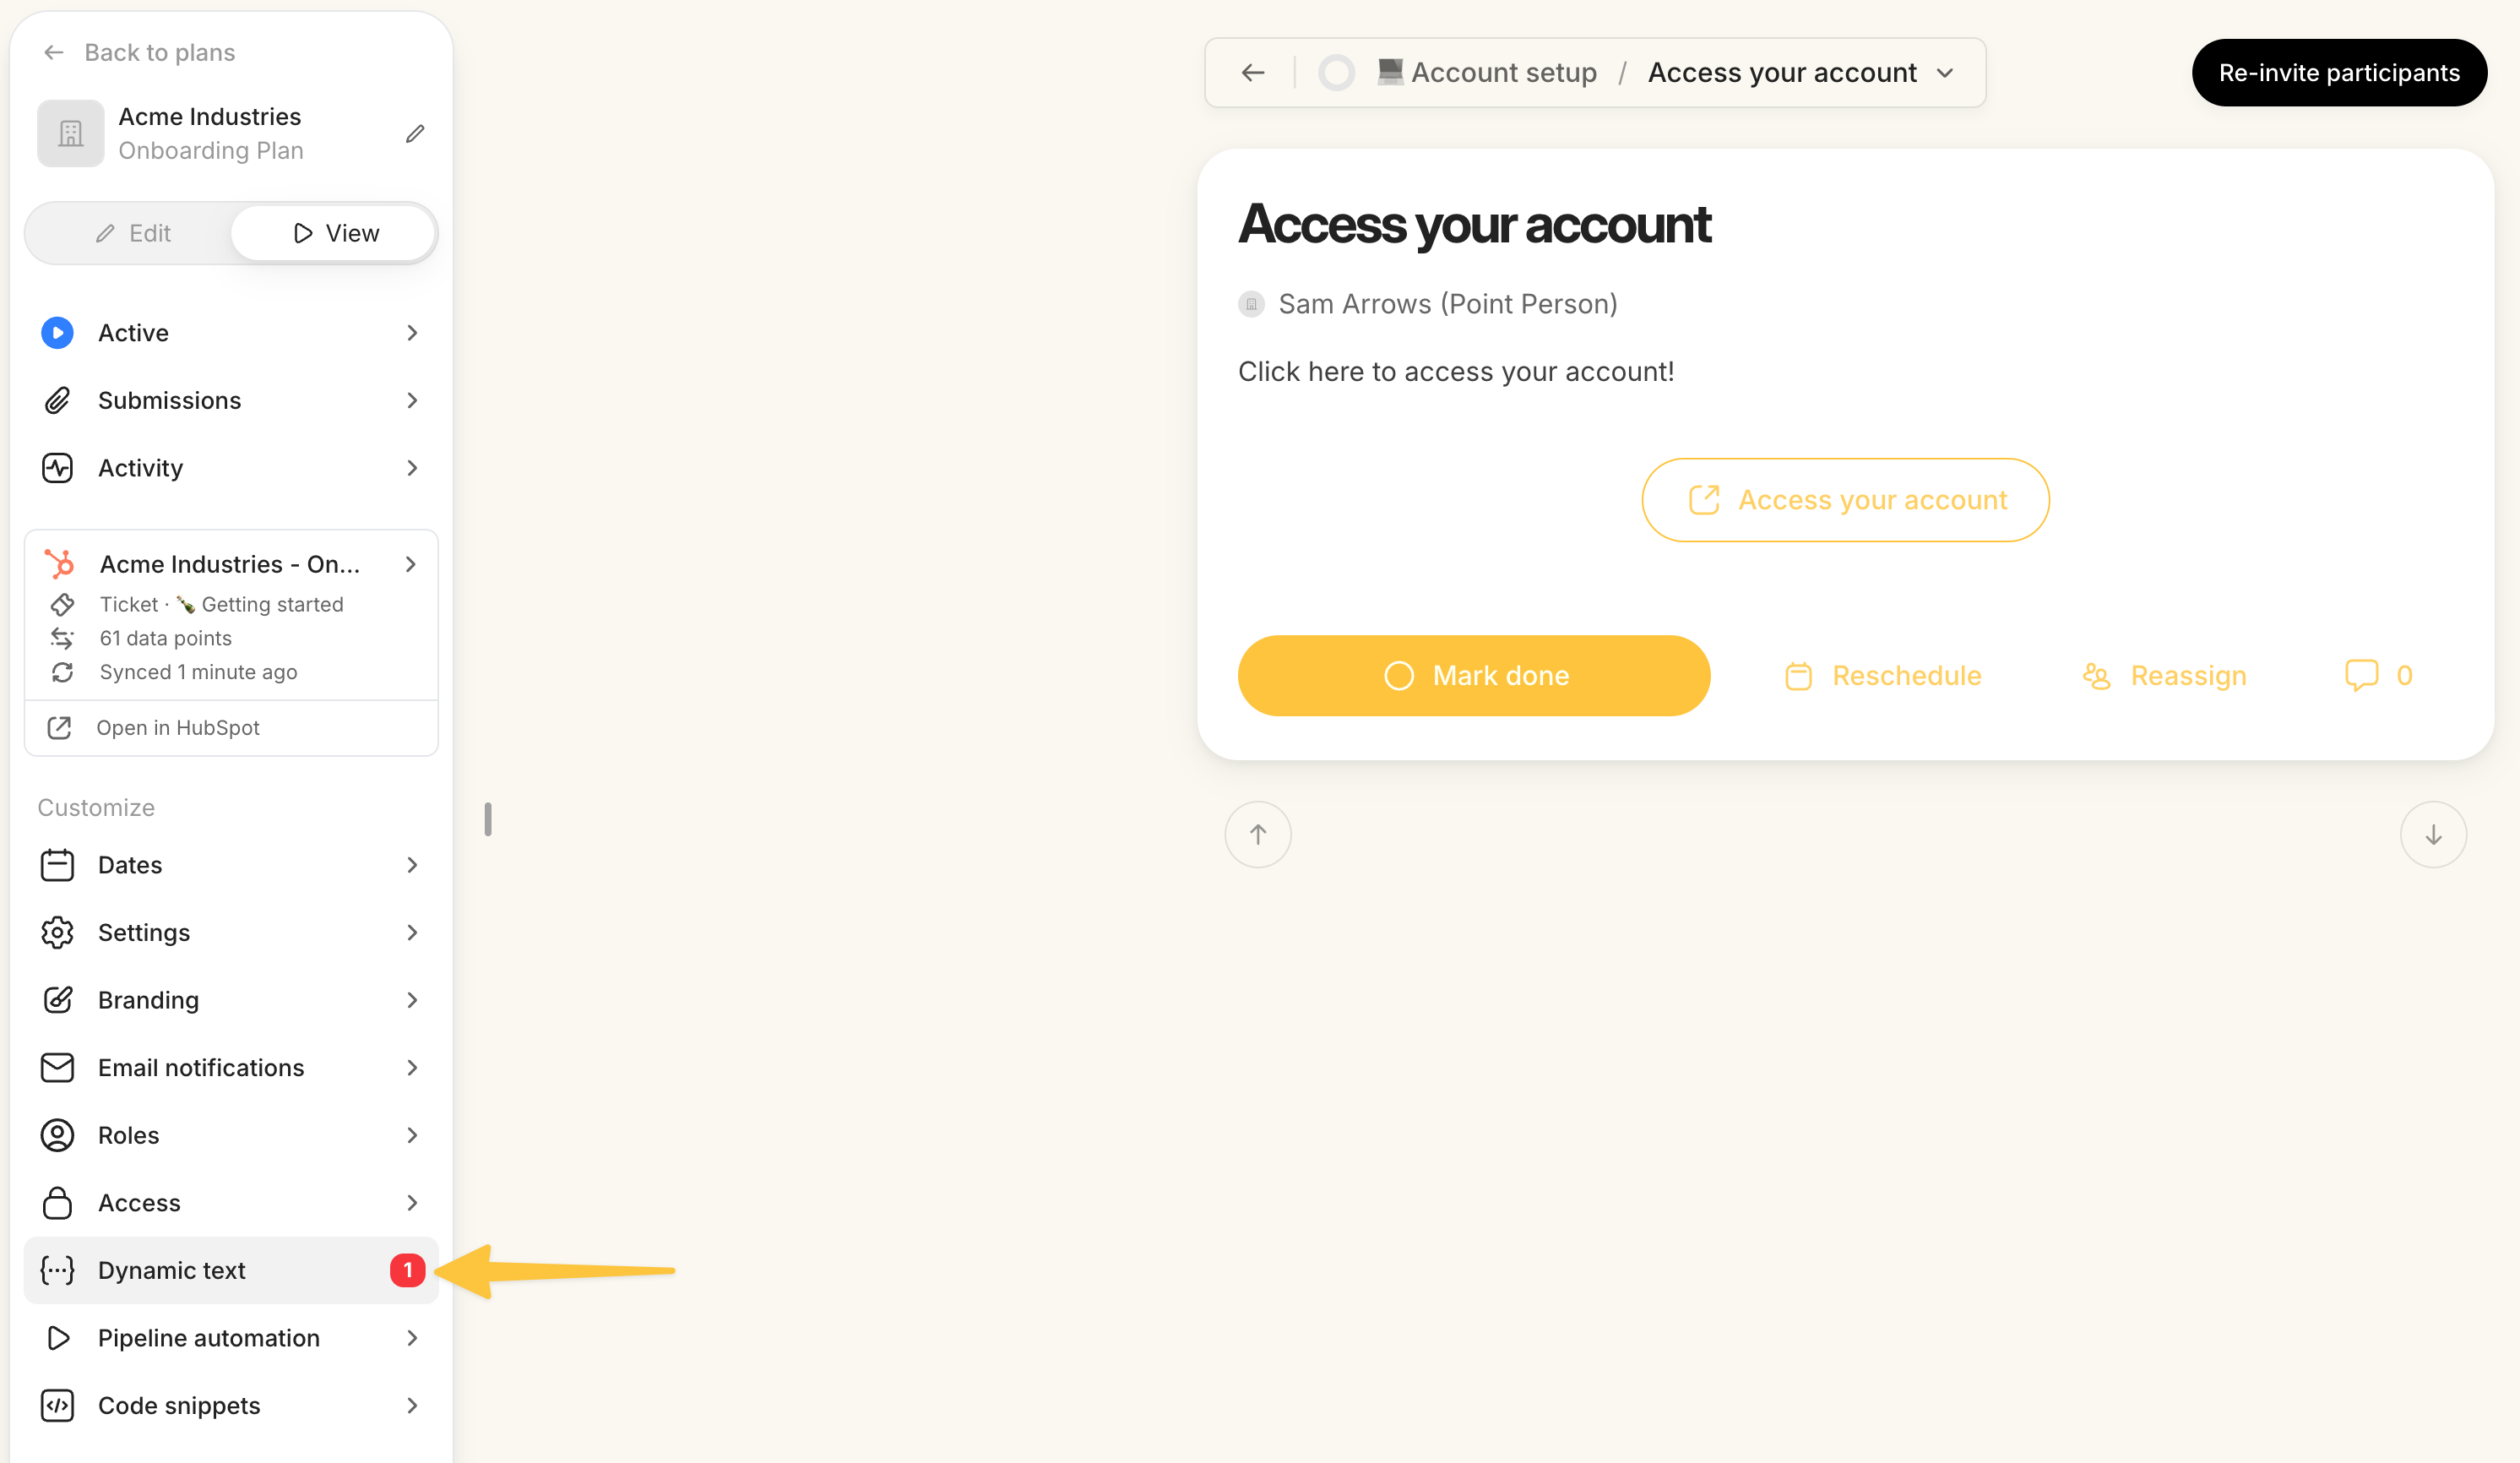
Open the plan template in Arrows
Go to the Dynamic Text section
Locate the property you just created in HubSpot
Copy the dynamic text tag - in our example, it will look something like
{{ ticket.hubspot_id }}
Note - you can use command or control F to "search" this section
Step 3: Add the Tag to Your Link
Now replace the hardcoded ID in your link with the dynamic text tag.
Open the task where you want to add the dynamic link
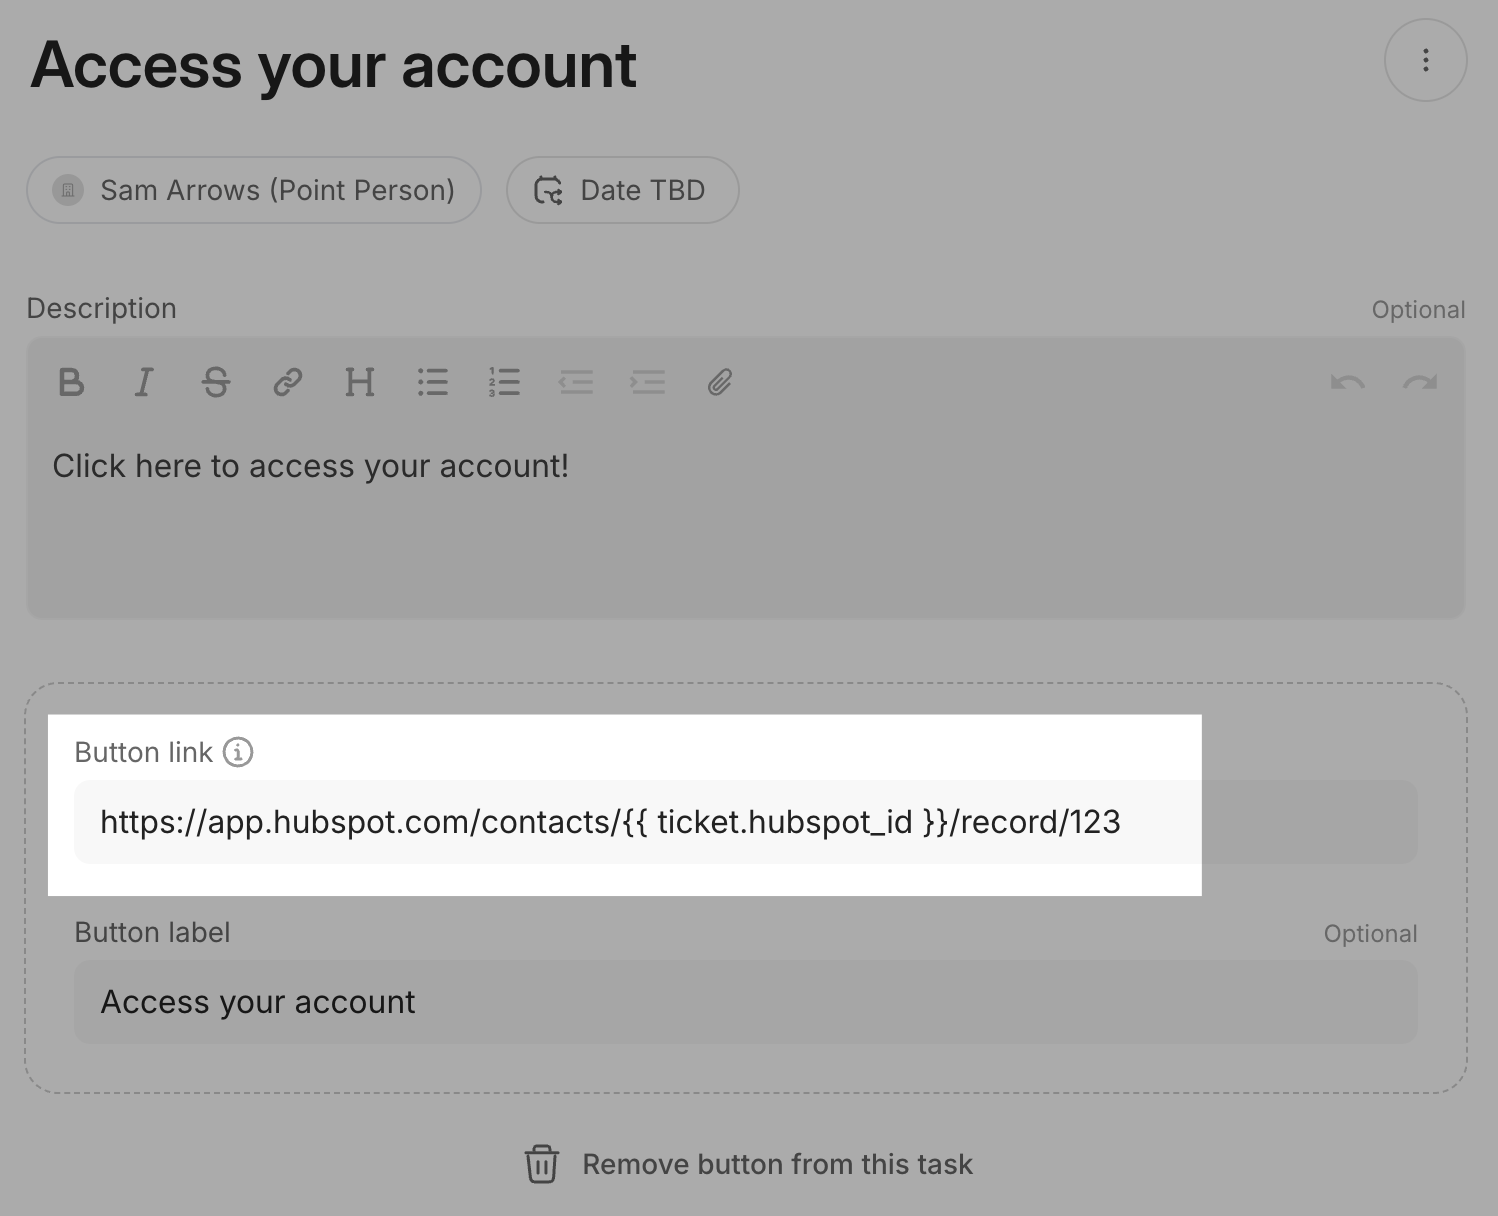
In the task action (button or link), locate where the ID currently appears in the URL
Replace the hardcoded ID with the dynamic text tag you copied
Before Example:
https://app.hubspot.com/contacts/123456/dealAfter Example:
https://app.hubspot.com/contacts/{{ticket.hubspot_id}}/deal
Step 4: Test the Dynamic Link
Verify that the dynamic link works correctly next time you have a plan associated to a HubSpot object.
Create a plan synced to a HubSpot record
Ensure the HubSpot property has a value populated for that record
Click the button/link in the task
Confirm it directs to the correct unique page
How It Works
When a plan is synced to a HubSpot record, Arrows reads the value stored in the property on that record and automatically inserts it into any dynamic text tag that references that property. This means:
Each customer's plan automatically includes these unique variables
You don't need to manually edit each task or plan
Updates to the property value in HubSpot automatically update the link in Arrows
Tips
Make sure the HubSpot property is populated for each record before creating plans (if missing, you'll see a notification on the dynamic text section in Arrows)
You can use multiple dynamic text tags in a single URL to create complex, multi-parameter links
Test with a few customer records to ensure the property values are formatted correctly for your URLs