
HubSpot workflow setup - create Arrows plan
HubSpot workflows can help you automate the manual parts of your process - giving you a chance to start scaling things.
The steps will help set up a workflow to create an Arrows plan for a customer once they are in a specific stage of a HubSpot pipeline
Note: this is a deal-based workflow, the same can be set up for a ticket, project, or service-based workflow depending on which object you use to manage your onboarding process!
1. Create a blank workflow in HubSpot
From the Automation menu in HubSpot, select Workflows.
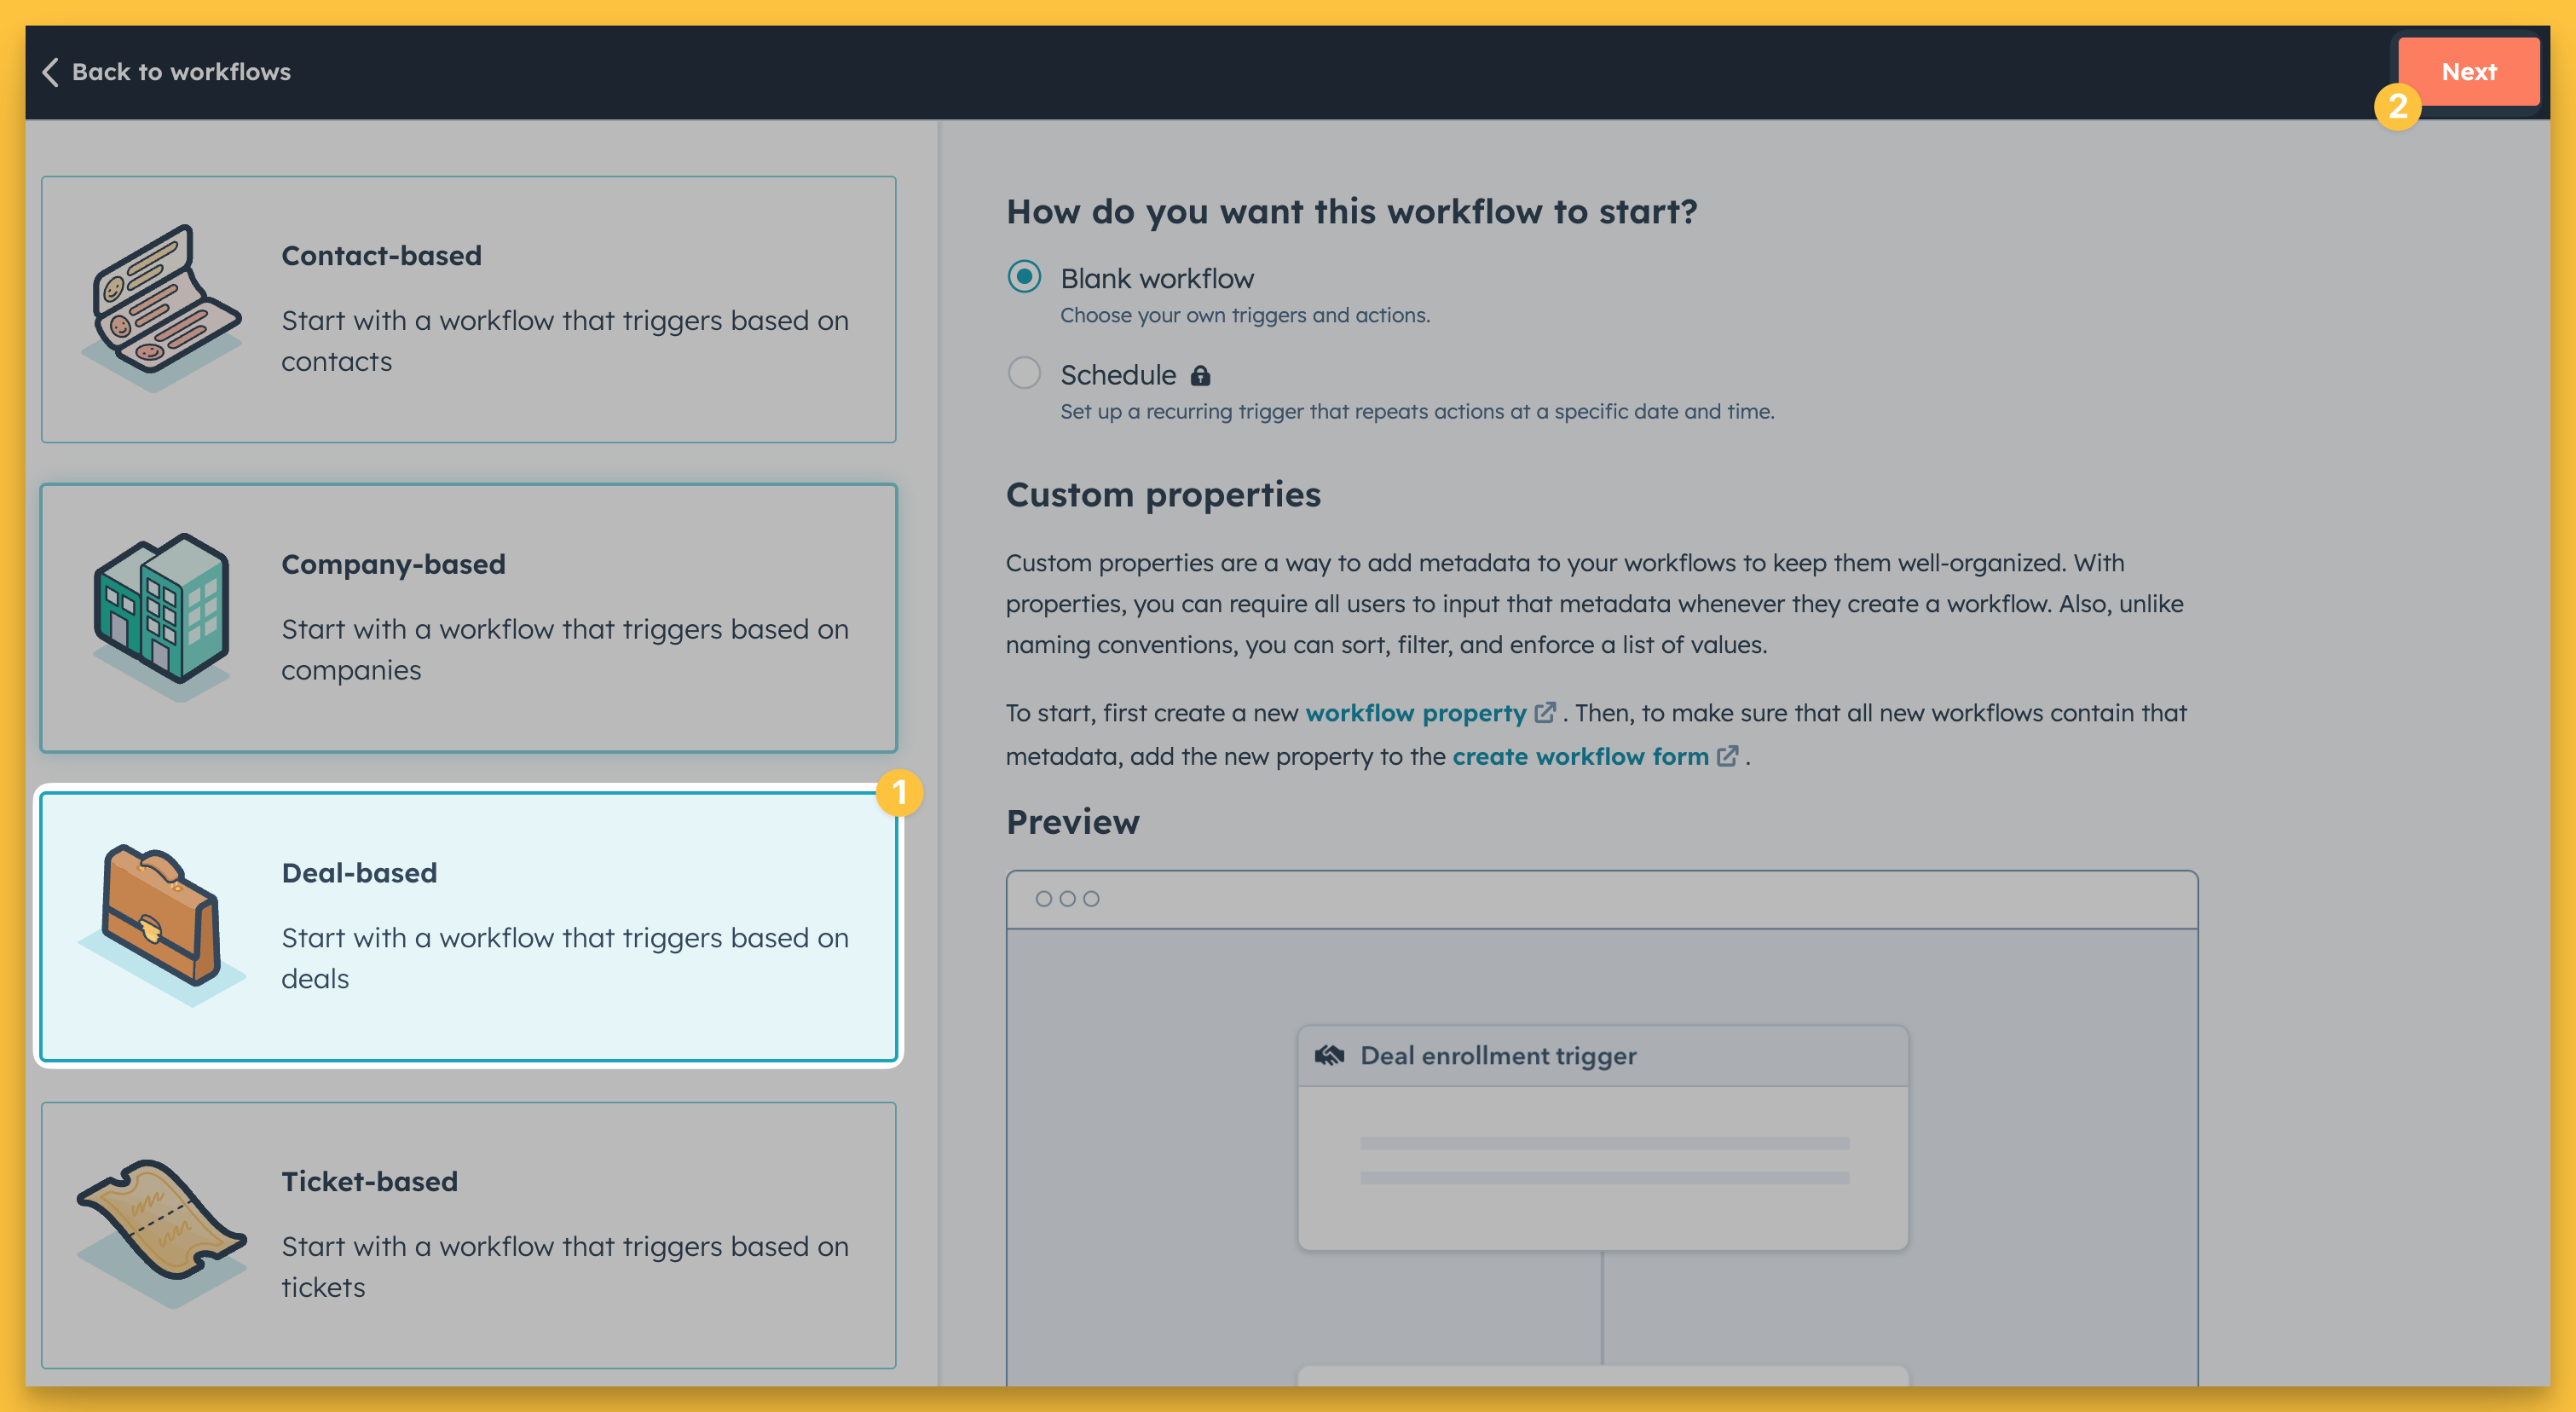
From the next screen, select Create workflow and choose the From scratch option.
From the next screen, be sure to:
select a Deal-based workflow (or whichever object you're using for onboarding)
hit Next, to build your workflow
2. Set enrollment trigger for your workflow
You set whatever trigger you’d like to initiate this plan creation!
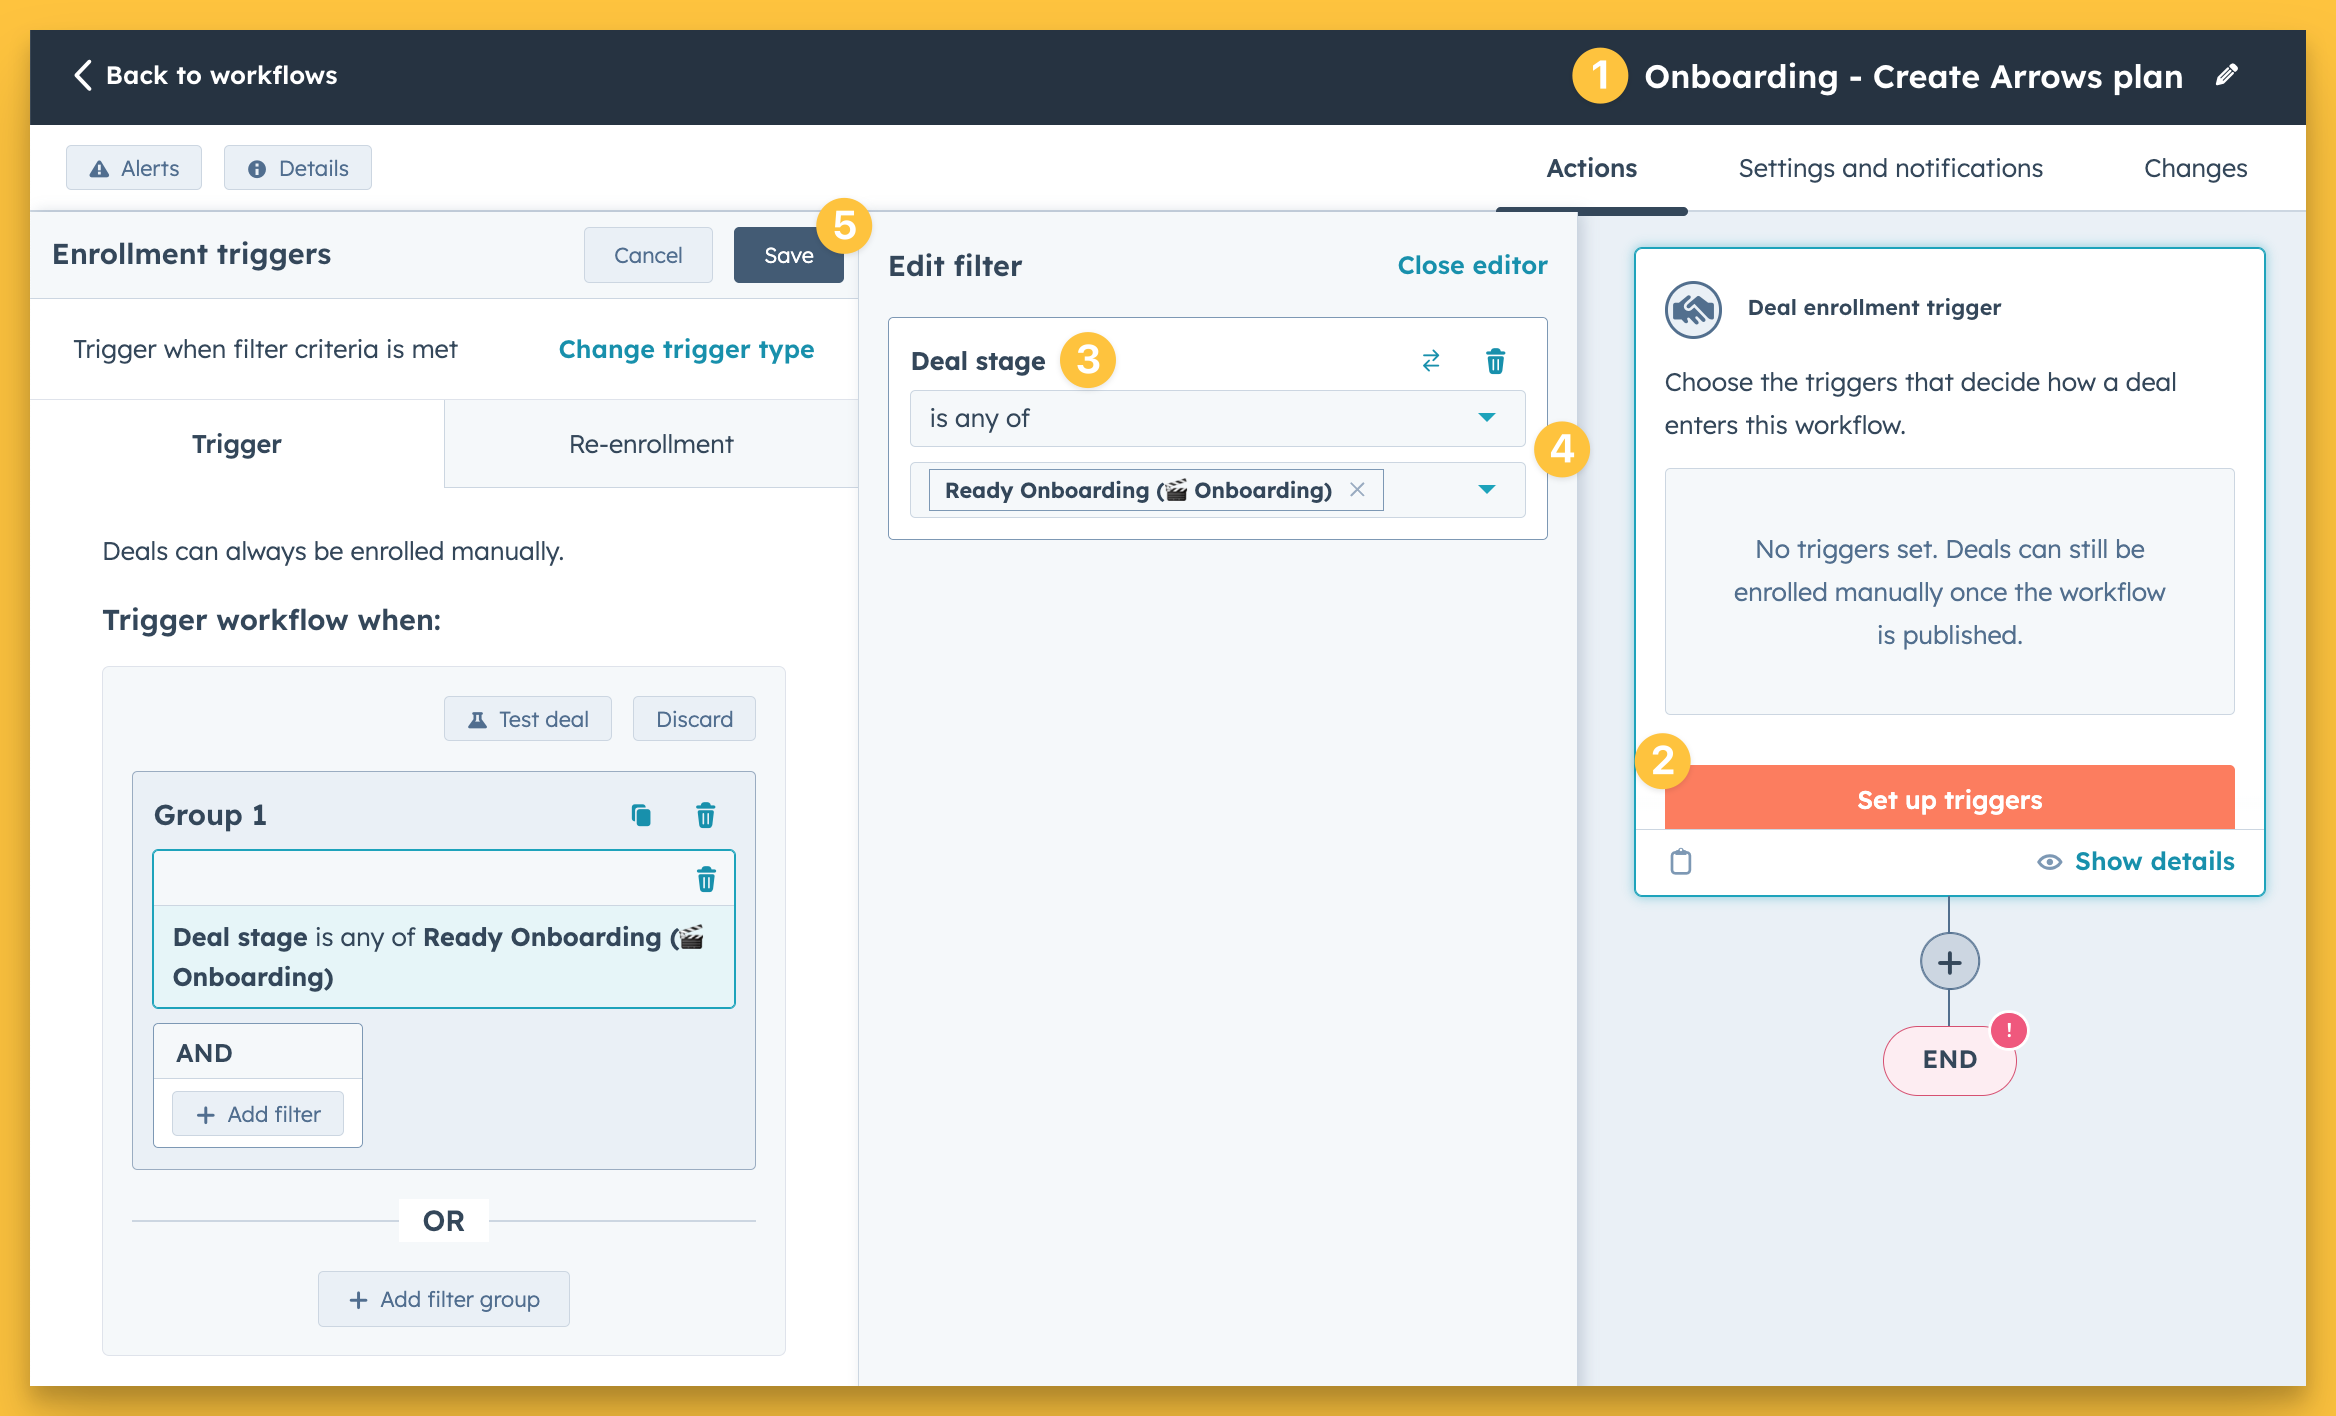
In this example, we are creating the plan when the customer reaches a certain stage of a pipeline - the Ready for onboarding stage of our Onboarding Pipeline.
Start by:
giving your workflow a unique name
selecting Set up triggers
select the Deal filter and search for Deal stage
set your conditions
hit Save
3. Add an action to create an Arrows plan
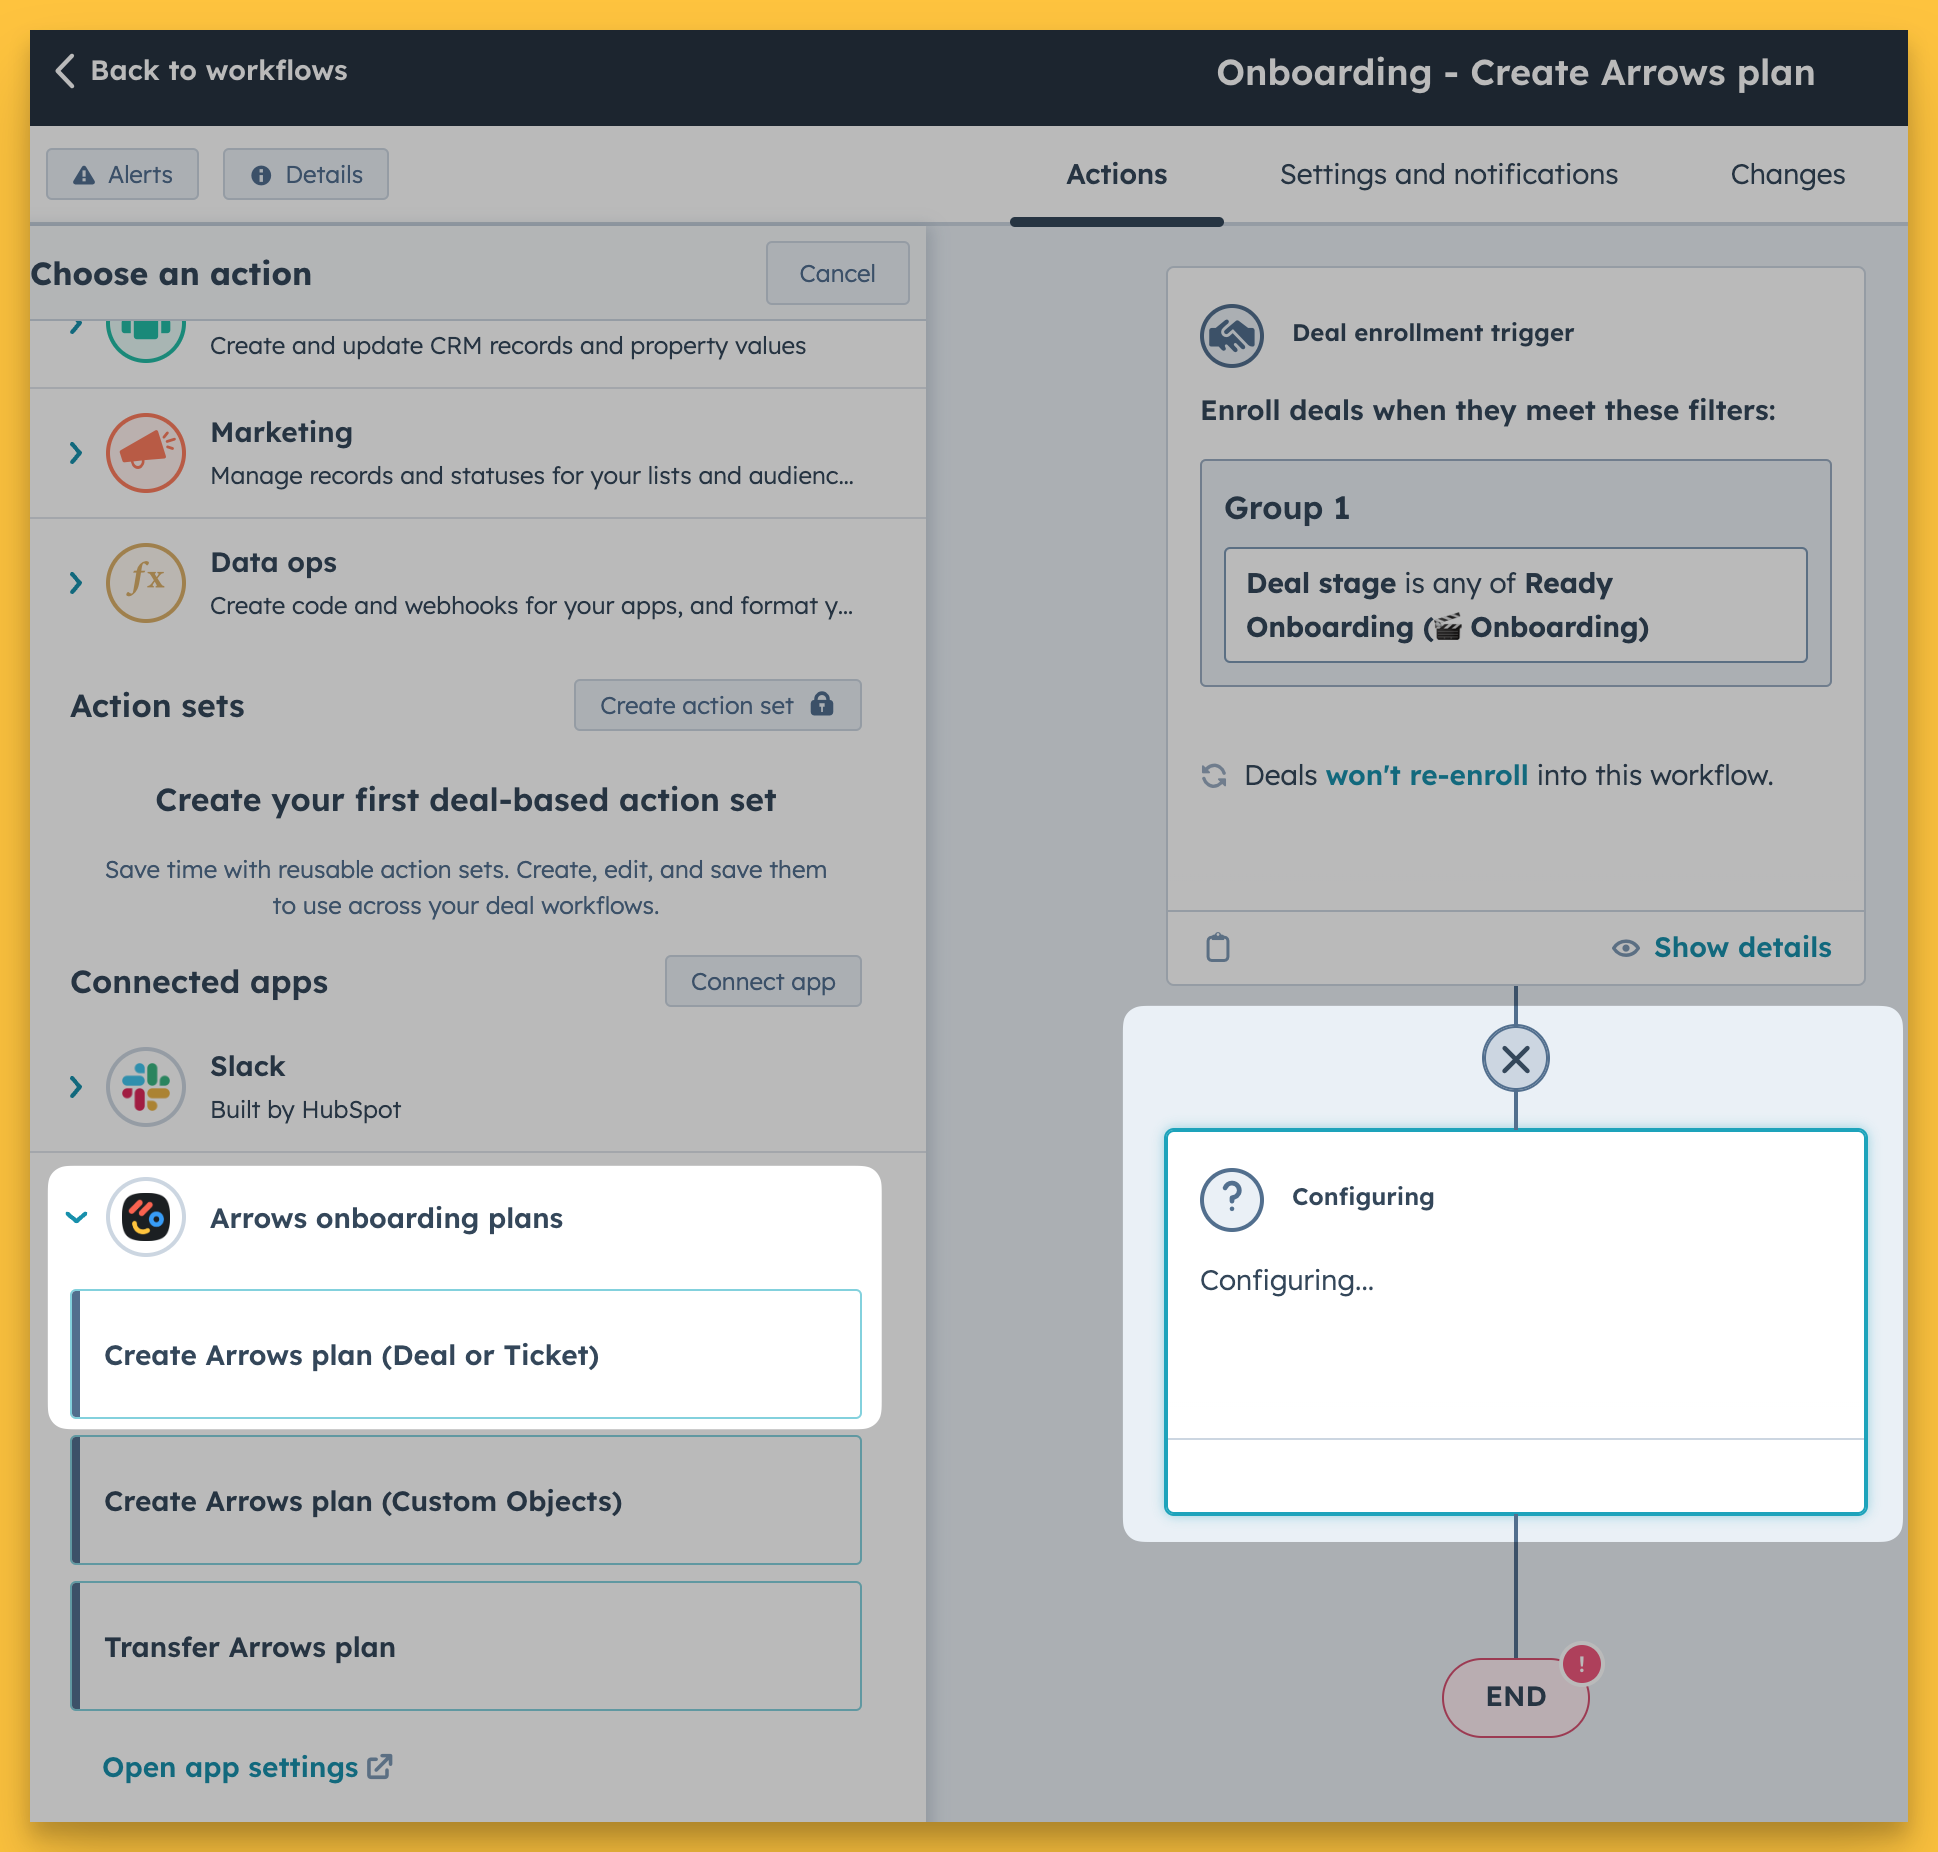
After an enrollment trigger has been saved, you can add the desired actions you want to see take place after that enrollment trigger is met - creating a plan in this case
add a new action
find the Arrows actions under the connected apps section
select the Create Arrows plan (Deal or Ticket)
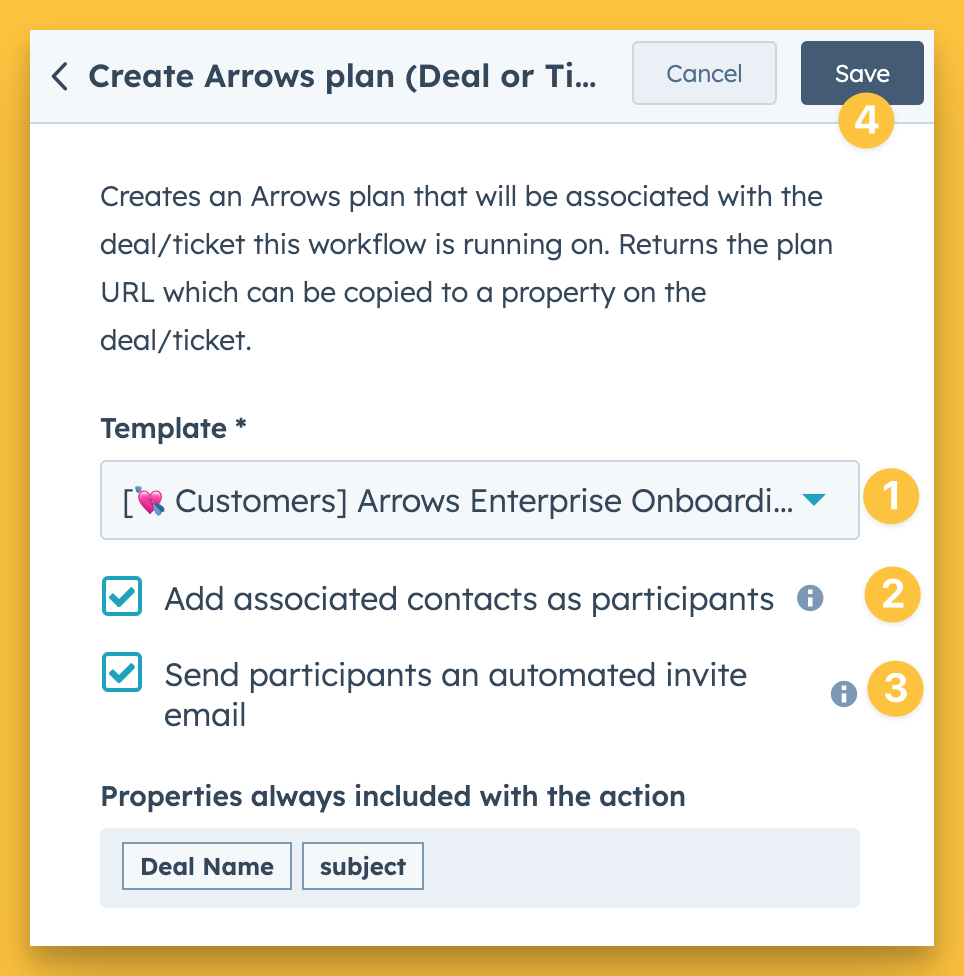
Next, determine what type of plan should be created.
Start by…
selecting the Template you wish to use for your plan
turn on/off the option add the contacts from your HubSpot object to the plans
turn on/off the option to send added participants an automated invite email (you can customize this welcome email in each Template’s settings in Arrows)
hit Save
Note: you can choose to just create the plan automatically and add/invite contacts later - pick whatever options work best for you!
5. Review and publish your workflow to turn it on
The last step is to turn on your workflow…
verify your Create Arrows plan workflow action
Select Review and publish when you are ready to set it live
The review screen is where you can make any final edits and see if there are existing deals that meet your workflow criteria.
You can choose to enroll those existing deals or only new deals going forward.
Select Turn on once you are done reviewing and your workflow is now live.
The next time a new deal meets that enrollment trigger you created, they will be enrolled in this workflow.
Removing manual steps from your process is a great way to create consistency AND ensure no one on your team drops the ball when it comes to staying on top of your customers’ needs.
As you incorporate successful internal processes to your day-to-day customer enablement efforts, be sure to use HubSpots workflows and automations to scale those efforts!